
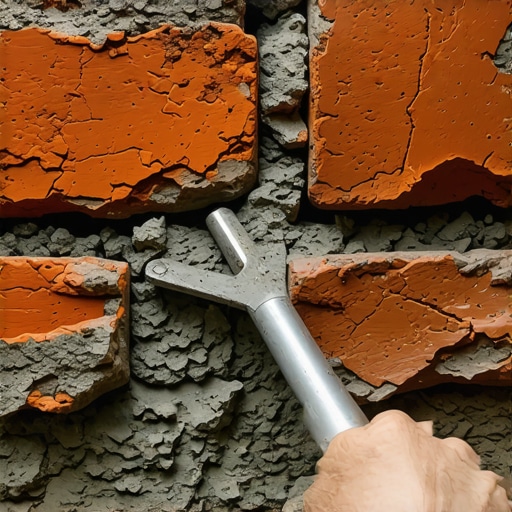
The Ghost of the Fire-Skin: A Lesson in Masonry Murder
I remember walking onto a job site in the historic district where a homeowner had just spent thirty grand to have their 1910 masonry ‘refreshed.’ Within two winters, the faces of the bricks were falling off like wet crackers. The contractor had used a high-strength Type S Portland cement on soft, coal-fired clay bricks. My mentor, a man who could tell the lime content of a mortar joint just by the way it tasted on his tongue, used to tell me that the mortar is the servant, and the brick is the master. If the servant gets too strong, he kills the master. That is exactly what happened here. By using a modern, rigid mortar, they had trapped the moisture behind the face of the brick. When that water froze and expanded by 9%, it didn’t push against the mortar; it blew the face—the vitrified fire-skin—clean off the brick. This is the tragedy of modern masonry restoration performed by those who don’t understand the physics of the wall.
The Physics of the Sacrificial Joint
When we talk about mortar repointing services, we aren’t just talking about aesthetics. We are talking about managing the movement of liquid and vapor through a structural mass. Old bricks, particularly those made before the widespread use of tunnel kilns, are incredibly porous. They breathe. They act like a sponge. In a proper system, the mortar joint must be the ‘sacrificial’ element. It must be softer and more vapor-permeable than the brick itself. This ensures that when the house settles or the temperature swings, the mortar takes the stress and the moisture evaporates through the joint, not the masonry unit. This is why fiber-reinforced mortars or modern stone veneer over brick applications often fail on historic structures; they create a vapor barrier that leads to catastrophic internal pressure.
“Mortar should always be weaker than the masonry units, so that any cracks that occur will be in the mortar joints where they can be easily repaired.” – BIA Technical Note 2
The Forensic Preparation: Cutting Without Killing
Before you ever touch a bag of mud, you have to get the old, failing material out. This is where most ‘handyman specials’ go off the rails. They take a 4-inch angle grinder and start zip-sawing the joints. One slip and you’ve notched the top or bottom of the brick, destroying its structural integrity and its ability to shed water. In forensic restoration, we use oscillating blades or, better yet, hand hammers and pneumatic chisels. We are looking for a depth of at least two to two-and-a-half times the height of the joint. If you have a 3/8-inch joint, you need to go nearly an inch deep to get a mechanical ‘tooth’ for the new material. You have to remove all the ‘punky’ mortar—the stuff that has turned back into sand due to foundation settlement or simple carbonation failure over the decades.
Micro-Zooming into the Chemistry of Suction
Once the joints are clean, you are left with a dusty, thirsty substrate. This is where the ‘suction’ comes into play. If you butter new mortar into a dry, dusty brick joint, the brick will instantly suck the water out of the mud. This is called ‘flash setting.’ The hydration process—the chemical reaction where the cementitious material forms crystals that interlock with the brick—needs water to complete. If the water is gone, the mortar won’t bond. It will just sit there like a loose plug of dried dirt. We call this ‘burning’ the joint. To prevent this, you must achieve a Saturated Surface Dry (SSD) condition. You mist the wall until the brick is dark with moisture but no longer glistening with standing water. This balances the osmotic pressure between the new mortar and the old clay.
“The bond between mortar and masonry unit is the most important property of the finished wall.” – ASTM C270 Standard Specification for Mortar for Unit Masonry
Mixing the Mud: The Alchemy of Lime and Sand
For a brick patio restoration or a historic chimney, you aren’t buying pre-mix bags from a big-box store. You are formulating. We often use Type O mortar (High-Lime) or even pure Lime Putty for pre-1900 structures. The sand is equally critical. You need a sharp, well-graded sand that matches the original ‘lift’ of the wall. When I’m matching a 100-year-old joint, I’m looking at the grain size under a loop. Is it river sand? Is it crushed limestone? This affects the brickwork pointing styles and the final ‘tooth’ of the surface. If you are doing a stone wall repair, the mix needs even more plasticity to handle the irregular shapes and deeper voids. We might use a slicker to tightly pack the material in 1/4-inch lifts, allowing each layer to firm up before the next is applied to avoid honeycombing or sagging.
Finishing the Joint: The Art of the Slicker
The final ‘strike’ of the joint determines the wall’s lifespan. Whether you are doing a soldier course over a window or a standard running bond, the way you use the hawk and slicker matters. A ‘concave’ or ‘weathered’ joint is the gold standard for shedding water. You are essentially ‘ironing’ the mortar, compacting the surface to close up the pores and create a tight seal against the brick edge. If you leave it ‘recessed’ or ‘raked’ in a freeze-thaw climate, you are just building a shelf for ice to sit on. This is where masonry staining can be used later to blend the new work with the old, but the physical shape of the joint is what stops the chimney sweep and repair bills from piling up ten years down the line. Unlike modular masonry construction where everything is uniform and clinical, old-world prep requires an obsession with the microscopic details of the bond. If you don’t respect the suction, the chemistry, and the physics of the ‘soft’ wall, you aren’t a mason; you’re just a guy with a trowel making a mess. Do it once, do it right, or don’t do it at all.