
The Forensic Reality: A Hairline Crack to the Core
The homeowner thought it was just a hairline crack. A simple cosmetic blemish on a forty-year-old basement wall. But when I put my scope inside that fissure, I didn’t see the solid gray of a poured wall. I saw the structural steel was rusted to dust, a victim of forty winters of water infiltration and chemical degradation. This is the forensic reality of foundation waterproofing. Most people wait until they see a puddle to care about their foundation, but by then, the rot has already taken hold of the rebar. We are talking about hydrostatic pressure—the weight of water-saturated soil pushing against your home’s bones with thousands of pounds of force. When the soil gets heavy, it doesn’t just sit there; it attacks.
“Water penetration is the single greatest threat to masonry durability.” – BIA Technical Note 7
I have spent thirty years looking at what happens when the ‘mud’ fails. I’ve seen chimney rebuild services required not because the fire was too hot, but because the exterior moisture turned the mortar into sand. In the masonry trade, we call it ‘the tooth’—the way mortar grabs onto the unit. When you seal a foundation from the outside, you aren’t just ‘painting’ a wall. You are creating a biological barrier against the relentless expansion of the Earth itself. In the North, where I spent a decade, the freeze-thaw cycle is a monster. Water expands 9% when it freezes. Imagine that expansion happening inside the microscopic pores of your concrete. If you don’t have proper tuckpointing weatherproofing on the upper levels and a solid membrane below, that expansion will pop the face right off your brickwork, a process we call spalling.
The Physics of the Wet Soil: Why Internal Sealants Fail
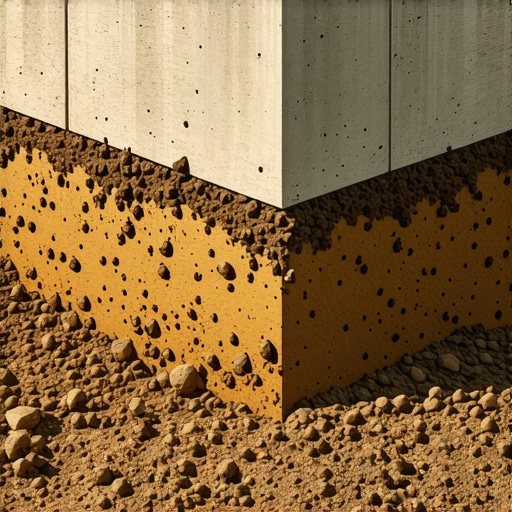
Homeowners love the ‘band-aid’ approach. They buy a bucket of waterproof paint at a big-box store and think they’ve solved the problem. That’s garbage. Applying a sealant to the inside of a foundation is like trying to hold back a flood with a piece of plywood on the wrong side of the dam. The water is already inside the wall. It’s sitting there, saturating the concrete, causing honeycombing and slowly dissolving the lime that keeps your structure rigid. To truly fix a wet basement, you have to get your hands in the dirt. You have to excavate down to the footer, expose the ‘cold joint’ where the wall meets the floor, and apply a multi-layered defense system. We start with a polymer-modified bituminous coating, ‘buttering’ it onto the concrete with the same precision I’d use for a soldier course on a high-end facade. This isn’t just paint; it’s a chemical bond that fuses with the substrate.
Micro-zooming into the chemistry, let’s talk about the hydration process. Concrete is never truly ‘done’ curing; it’s a living, breathing material that undergoes carbonation over decades. When we talk about facade cleaning or preparing a foundation wall, we have to ensure the ‘suction’ is right. If the wall is too dry, it sucks the moisture out of the waterproofing membrane too fast, causing it to ‘flash set’ and lose its elasticity. You want a membrane that can stretch when the house settles. Because houses always settle. If your waterproofing is rigid, it cracks. If it cracks, the game is over.
The Anatomy of a Proper Exterior Seal
A real pro doesn’t just slap on some tar and call it a day. We look at the whole system. This includes stone coping installation at the top of the grade to divert water away from the wall. We look at the structural brick ties replacement if the upper facade is pulling away, allowing water to bypass the foundation seal entirely. I’ve seen jobs where people spend twenty grand on foundation work but leave a failing chimney. Water travels. It finds the path of least resistance, often running down the cavity behind the brickwork, bypassing your fancy new foundation membrane like a highway detour. This is why chimney rebuild services and tuckpointing curved walls are often part of a holistic waterproofing strategy. You have to stop the water at the roofline, the beltline, and the footer.
“The primary function of a masonry wall is to resist the penetration of moisture to the interior of the building.” – ASTM C270 Standards
When I’m out there with a hawk and a slicker, I’m not just making things look pretty. I’m engineering a shedding system. For example, masonry birdsmouth cuts in decorative work must be sealed with the same intensity as a basement wall. If water sits in those notches, it’s a direct conduit to the interior. The same goes for modern metallic masonry finishes. While they look sharp, if they aren’t integrated with a proper drainage plane, they can trap moisture against the backup wall, leading to rapid oxidation of the wall ties.
Is it Worth the Dirt? The Economics of Excavation
Let’s talk about the ‘scams’ and the ‘handyman specials.’ You’ll see guys promising ‘no-dig’ solutions. They want to inject some magic foam into the ground and charge you five grand. Save your money. Unless you are using helical piers to stabilize a sinking slab, injection is usually a temporary fix for a permanent problem. The only way to guarantee a dry basement is to change the physics of the site. That means excavation, a dimpled drainage board to relieve hydrostatic pressure, and a new perforated drain tile (the ‘Big O’) bedded in clean, one-inch washed stone. This creates a vacuum of pressure around your home. Instead of the water pushing against your wall, it falls into the stone, enters the pipe, and is whisked away to a sump pit or a daylight exit.
I remember a job where we had to do an outdoor fireplace rebuild because the original builder didn’t understand soil heaving. The fireplace was leaning like the Tower of Pisa because the ‘mud’ used in the foundation was a cheap Type M mix that couldn’t handle the sulfate in the soil. We had to excavate the whole thing, apply a heavy-duty foundation waterproofing membrane, and reset the base. It’s the same principle for your house. If the base is wet, the house is dying. You might think $30,000 is a lot for a waterproofing job, but compare that to the cost of a structural collapse or the mold remediation required when your finished basement becomes an aquarium.
Advanced Materials and Master Techniques
In the trade, we have a saying: ‘The trowel never lies.’ When you are tuckpointing weatherproofing into a historic wall, you have to match the mortar to the brick. If you use a hard Portland cement on soft, pre-1940s brick, you’ll kill the building. The mortar must be the sacrificial lamb. It has to be softer than the brick so that when the wall moves, the mortar cracks, not the masonry. The same logic applies to foundation coatings. They have to be the toughest thing on the job site. We use elastomeric membranes that can bridge a 1/8th-inch crack without breaking the seal. We look for ‘honeycombing’—those air pockets in the concrete—and we parge them smooth before the membrane goes on. If you leave those voids, the membrane will eventually ‘suck’ into them under the pressure of the dirt and pop.
Whether you are looking at stone coping installation to protect a parapet or deep-trenching for a dry basement, the mission is the same: Control the water. Don’t let the ‘lick-and-stick’ contractors tell you a spray-on sealer is enough. If they aren’t talking about the ‘tooth’ of the substrate or the hydrostatic head pressure, they don’t know their craft. You do it once, or you do it twice. And doing it twice usually involves a lot more tears and a much bigger checkbook. Real masonry isn’t just about what you see on the surface; it’s about the silent war being fought under the dirt every time it rains. Invest in the exterior seal. Your grand-kids will thank you when the house is still standing straight and dry a hundred years from now.