
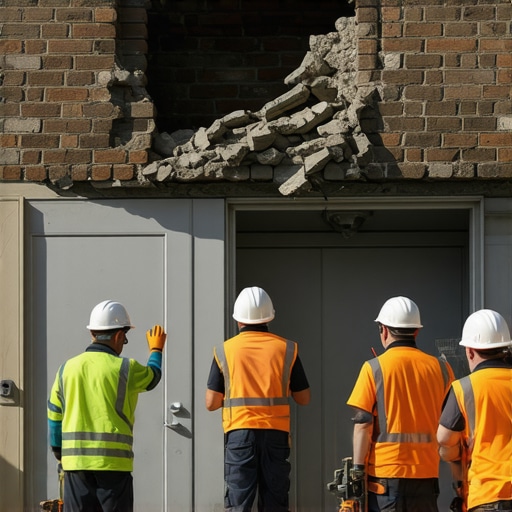
The Forensic Scene: When a Hairline Crack Becomes a Structural Threat
The homeowner thought it was just a hairline crack. A thin, zigzagging line creeping up from the corner of the window frame, barely thick enough to fit a credit card. But when I put my scope inside that gap, the reality was much grimmer. I didn’t see solid masonry or a clean air barrier; I saw the structural steel was rusted to dust. That steel lintel, the invisible backbone holding up 1,500 pounds of brickwork above the opening, had succumbed to corrosion jacking. This is the moment where the ‘jaws of the house’ start to open. Most people ignore these ‘smiles’—the sagging curves in the soldier course above their doors—until a brick literally falls onto the welcome mat. By then, you aren’t just looking at a minor repair; you are looking at a full-scale masonry rescue mission. Dealing with a dropped brick lintel requires more than just a bucket of mud and a trowel; it requires an understanding of the violent physics of expanding iron oxide and the delicate arching action of historic masonry.
“Water penetration is the single greatest threat to masonry durability.” – BIA Technical Note 7
The Physics of Failure: Why Steel Betrays the Brick
To understand why a lintel drops, you have to look at the chemistry of the steel itself. In most homes, the lintel is a simple angle iron—a piece of L-shaped steel that carries the weight of the masonry over a void. When water penetrates the outer wythe, usually through failed mortar joints or lack of proper weep holes, it sits on that steel. Steel doesn’t just rust; it undergoes a volumetric expansion known as corrosion jacking. As the iron oxidizes, the resulting rust occupies up to ten times the volume of the original metal. This isn’t a slow, gentle push. This is a relentless force that can exert thousands of pounds of pressure per square inch. It lifts the bricks above it, breaking the bond of the mortar, and eventually, the steel thins out so much it can no longer support the dead load of the wall. That is when the deflection starts. That ‘sag’ you see is the sound of the masonry’s structural integrity screaming for help. If you’re seeing masonry staining—those nasty orange or brown streaks—that’s the steel bleeding through the brick, a forensic indicator that the internal support is disintegrating.
The Forensic Inspection: Stair-Steps and Smile Lines
When I arrive at a site, I look for the ‘tells.’ A stair-step crack leading away from the corners of a window is the classic signature of settlement or lintel rotation. If the crack is wider at the top than the bottom, the wall is pulling away. If it’s wider at the bottom, the lintel is dropping. I look for ‘honeycombing’ in the mortar—places where the mud was never properly packed, allowing water to pool. I also check the suction of the surrounding bricks. If the original mason used a high-suction brick without pre-wetting it, the mud would have ‘burned’ or dried too fast, leaving a brittle bond that fails the moment the steel begins to move. In historic brick salvage situations, you often find that someone previously tried to fix these cracks with modern Portland cement. That’s a death sentence for old, soft bricks. The hard cement doesn’t breathe, trapping more moisture against the steel and accelerating the very rot they were trying to stop.
Brick Lintel Replacement: The Master Mason’s Process
You don’t just pull out a lintel and slide a new one in. You have to respect the ‘arching action’ of the wall. First, we install temporary shoring, often using ‘needles’—heavy timbers or steel beams driven through the wall above the failure point—to carry the load while the opening is vulnerable. Then comes the surgical removal of the soldier course. We carefully extract each brick, especially if we are performing historic brick salvage to ensure the color and ‘tooth’ match the original facade. Once the old, scaly steel is out, we inspect the backup wall. If the backup is crumbling, we might use concrete pump masonry mixes to stabilize the core before the new lintel is set. The new steel must be hot-dipped galvanized—ASTM A123 is the standard here—to prevent a repeat of the corrosion cycle. We don’t just ‘butter’ the bricks and slap them back in. We use a Type N or Type O mortar, depending on the brick’s compressive strength, and we ensure the mud has the right ‘slip’ to create a full bed joint.
“Steel members should be protected from corrosion by painting or galvanizing… Flashing should be installed over all lintels.” – BIA Technical Note 31B
Advanced Materials and the ‘Lick-and-Stick’ Trap
I see a lot of handymen trying to solve these issues with advanced masonry adhesives. While those have their place in non-structural stone wall repair or attaching thin veneer, they are not a substitute for mechanical support in a load-bearing lintel. You cannot glue a sagging house back together. Similarly, when we see spalled concrete steps repair nearby, it’s often a sign of the same systemic moisture problem. The salt used in winter penetrates the pores, freezes, and pops the face off the concrete, much like how rust pops the face off a brick. For these repairs, we use air-entrained concrete mixes that can handle the 9% expansion of freezing water without shattering the matrix. For the lintel, the most critical ‘advanced’ material isn’t the glue—it’s the flashing. High-performance rubberized asphalt or copper laminates must be integrated behind the brick and over the new steel to direct water out through the weep holes.
The Cost of Neglect vs. The Value of Restoration
If you ignore a dropping lintel, the damage spreads. It’s not just the bricks; it’s the window frame being crushed, the interior plaster cracking, and eventually, the potential for a catastrophic collapse of the masonry wythe. In complex cases involving retaining wall reinforcement, where the soil is pushing against the foundation, a failing lintel can be the ‘tipping point’ that leads to total wall failure. Professional masonry repair services are an investment in the building’s lifespan. When we finish a job, we use a slicker to strike the joints, ensuring they are compacted and shed water. We might apply a silane-based water repellent to prevent future masonry water damage repair needs, but only after we are sure the wall can still breathe. A master mason doesn’t just hide the cracks; we solve the physics that caused them. We ensure that the next generation won’t need a forensic inspector to tell them why their house is falling down. We do it once, we do it right, and we let the mud speak for itself.