
The Forensic Scene: When the Bond Lies to You
The facility manager thought it was just a minor cosmetic issue, a bit of flaking on the loading dock floor that needed a quick patch. But when I brought my borescope to the edge of the delamination and peered into the micro-voids, I didn’t see a solid substrate. I saw a graveyard of pulverized cement paste and trapped moisture. The previous crew had simply scuffed the surface with a floor sander, applied a high-dollar epoxy, and called it a day. Within six months, the ‘permanent’ bond had turned into a brittle shell, separating from the base as easily as dead skin after a sunburn. This is the reality of professional masonry restoration: if you don’t respect the physics of the surface, the surface will eventually reject you.
“To provide a permanent bond, the substrate must be sound and possess a texture that allows for mechanical interlock.” – ICRI Guideline 310.2R
The Micro-Chemistry of Laitance
To understand why sanding usually fails where grinding succeeds, we have to zoom into the first 1/16th of an inch of a concrete slab. When concrete is poured and troweled, the heavier aggregates settle while the water and fine cement particles rise to the top. This creates a weak, milky layer known as laitance. This layer is chemically inferior to the mass below it. It is porous, brittle, and has the structural integrity of a soda cracker. If you are performing commercial masonry maintenance or an emergency masonry repair, applying new ‘mud’ or a coating to laitance is a death sentence for the project. Sanding merely polishes this weak layer. It might take the shine off, but it doesn’t remove the structural weakness. Grinding, however, is a surgical strike. It shears through the laitance to reveal the coarse aggregate and the uncompromised C-S-H (Calcium Silicate Hydrate) crystals that give concrete its real strength. In the North, where the freeze-thaw cycle is a relentless hammer, any moisture trapped in the micro-fissures of laitance will expand by 9% upon freezing, popping your repair right off the substrate.
Sanding: The Cosmetic Illusion
Don’t get me wrong, sanding has its place, but that place isn’t in structural masonry inspection or heavy-duty repair. Sanding uses abrasive paper to create a ‘profile,’ but in reality, it often just clogs the existing pores with fine dust. Even with a high-powered vacuum, the ‘tooth’ created by sanding is shallow. If you’re prepping for a thin-film sealer on a decorative patio, fine. But if you’re looking at foundation wall bowing repair or installing a stone veneer over brick, sanding provides zero mechanical key. The ‘suction’ isn’t there. You’re essentially trying to glue two pieces of glass together with wet sand in between. When I see a ‘handyman special’ where they’ve sanded a wall before parging, I know I’ll be back in two years to fix the honeycombing and the cold joints that inevitably form.
Grinding: Achieving the Mechanical Key
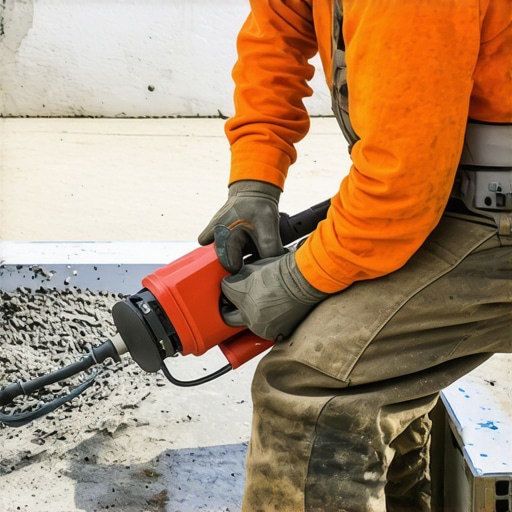
Grinding is a different beast entirely. We’re talking about diamond-segmented wheels spinning at 3,000 RPM, literally tearing the top layer of the concrete away. This process achieves what we call a Concrete Surface Profile (CSP) of 3 to 9, depending on the grit. For commercial smokestack repair or high-stress environments, we need that rugged, sandpaper-like texture that you can only get through mechanical grinding or shot blasting. This texture creates ‘peaks and valleys.’ When you apply your mortar matching services or a structural epoxy, the material flows into these valleys and ‘hooks’ around the peaks. This is mechanical interlocking. It’s the difference between a ‘lick-and-stick’ veneer and a monolithic bond that can withstand thermal expansion. In hot climates like Texas or Arizona, where walls can heat up to 150 degrees, the thermal movement would shear a sanded bond in a single season. Grinding ensures the two materials move as one.
“The surface must be free of laitance, ice, snow, grease, oil, dust, and other contaminants to ensure the integrity of the repair material.” – ASTM D4258
The Physics of Suction and Hydration
When we talk about ‘buttering’ a stone or applying a repair mortar, we’re relying on the ‘suction’ of the substrate. A ground surface is an open-pore surface. It is thirsty. When you apply your new mix, the capillary action of the ground concrete pulls the cement paste deep into its structure. This creates a transition zone where the old concrete and the new material are chemically intertwined. This is critical for retaining wall weep hole cleaning and structural stabilization. If the surface is just sanded, the dust particles block these capillaries, leading to a ‘dry bond’ where the repair material doesn’t actually hydrate into the base. It just sits on top, waiting for the first sign of hydrostatic pressure to push it off. This is why foundation helical pier installation often requires grinding the contact points on the footing; we need that steel-to-concrete interface to be absolute, not buffered by a layer of prehistoric dust and laitance.
The Forensic Conclusion: Do it Once or Do it Twice
In my forty years of swinging a hawk and trowel, I’ve never seen a sanding job outlast a grinding job in a structural context. Whether you’re dealing with a residential basement or a massive commercial smokestack, the prep is 90% of the battle. If you skip the grinding to save a few bucks on labor, you’re just financing a future failure. You’re building on a foundation of dust. True masonry is about permanence. It’s about respecting the stone and the concrete enough to expose its heart before you ask it to hold a load. If the concrete doesn’t ‘bite’ back when you touch it, it’s not ready for a bond. Don’t be fooled by the smooth, clean look of a sanded floor; look for the raw, jagged aggregate of a ground surface. That’s where the strength lives.