
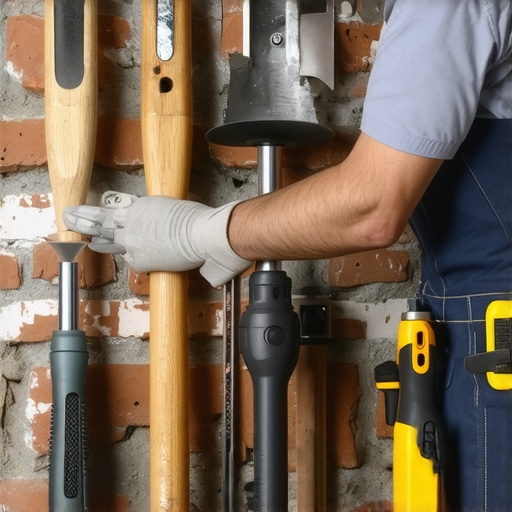
I stood on a swaying scaffold in the teeth of a late October gale, staring at what the homeowner called a ‘minor hairline crack’ in the third-story soldier course. To the untrained eye, it was a cosmetic nuisance. But when I inserted the fiber-optic scope into the void, the truth was grim: the structural steel lintel behind the facade was rusted to the point of disintegration, expanding like a puff pastry and pushing the entire masonry skin outward. This wasn’t a job for a quick smear of mortar; it was a forensic rescue mission. Most DIYers approach masonry as a decorative art, but it is actually a brutal war against physics and the inevitable expansion of water. When you are dealing with stone wall repair or brick quoin repair, you aren’t just filling gaps; you are managing the breath of the building. In the North, where the freeze-thaw cycle turns trapped moisture into a hydraulic jack, the wrong tool or the wrong ‘mud’ is a death sentence for your home’s exterior.
“Water penetration is the single greatest threat to masonry durability, leading to efflorescence, spalling, and the eventual failure of the structural bond.” – BIA Technical Note 7
The Physics of the Mess: Why Modern Mortar Fails
Before you pick up a trowel, you have to understand the ‘suction’ of the brick. A dry, thirsty clay brick will pull the moisture out of your mortar faster than you can strike it, leading to a ‘flash set’ that never properly hydrates. This is where most novices fail, leaving behind a crumbly, sandy mess that falls out within two seasons. The chemistry of hydration—the process where tricalcium silicate in Portland cement or the carbonation of lime in historical mixes creates a crystalline bond—requires a precise water-to-binder ratio. If you lose that water to the brick face too quickly, the bond never happens. This is especially critical during brick veneer detachment repair, where the goal is to re-establish a connection between the veneer and the substrate without creating a rigid ‘cold joint’ that will just crack again under thermal expansion.
Many homeowners reach for tile grouts on masonry when they see a small gap, but that is a catastrophic error. Tile grout is often polymer-modified and far too dense; it lacks the permeability required for exterior walls. When you trap moisture behind a non-breathable grout, and the temperature drops below thirty-two degrees, that water expands by nine percent. That pressure has to go somewhere, and it usually takes the face of your expensive brick with it in a process called spalling. This is why professional flush pointing services always specify a mortar that is softer than the surrounding masonry units. The mortar must be the sacrificial element of the wall, absorbing the stress and the moisture so the brick survives.
Tool 1: The Professional Hawk and the Logic of the Mud
The first tool to stop the mess is the Hawk. Most DIYers try to work out of a five-gallon bucket, which is a recipe for fatigue and a dirty facade. The Hawk—a flat square of aluminum with a handle underneath—allows you to hold a manageable ‘pie’ of mortar right at the joint. By keeping the mud on the hawk, you can ‘butter’ your slicker tool without reaching down, reducing the chance of dropping wet mortar onto the brick face. When performing a masonry birdsmouth cut or a complex brick quoin repair, the hawk gives you the control to mix small amounts of ‘mud’ to the perfect peanut-butter consistency. If your mud is too wet, it smears and stains; if it’s too dry, it won’t take the ‘tooth’ of the stone. You want a mix that hangs onto the trowel when turned upside down but slides off with a sharp flick.
Tool 2: The Slicker (Jointer) and the Pressure Principle
The second tool is the slicker, also known as a tuckpointing tool. This isn’t just a skinny trowel; it is a precision instrument designed to pack the mortar deep into the joint. In the world of structural masonry inspection, we look for ‘honeycombing’—the tiny air pockets left behind when mortar is just slapped into the front of a joint. You have to pack the joint from the back to the front. The slicker allows you to exert focused pressure, ensuring the mortar is compressed. Compression is key to durability. A compressed joint has a tighter pore structure, making it more resistant to water penetration. When restoring an outdoor masonry fountain restoration project, this compression is the only thing standing between your stone and the relentless hydrostatic pressure of the water.
Tool 3: The Mortar Gun (With Caveats)
The third tool for the time-pressed DIYer is the mortar gun, which looks like a giant caulking gun. While some purists hate them, they are invaluable for deep-cavity work or when dealing with robotic masonry repair systems that require consistent material flow. However, the mess happens when the mix is too thin. To use a gun successfully, you need a plasticizer in your mix to keep the sand in suspension. If the sand separates, the gun jams, and you end up with a ‘blowout’ that covers your wall in gray sludge. For those doing stone wall repair where the joints are irregular and deep, the gun can save hours, but it must be followed immediately by a slicker to pack the joint and ‘strike’ it for a professional finish. After the mortar has reached a ‘thumbprint hard’ state, you strike it to create the final profile—be it a V-joint, a weather joint, or a concave joint—which is the final defense against shedding water away from the wall.
“In restoration, the new mortar should always be slightly weaker and more permeable than the original masonry units to prevent irreversible damage to the historic fabric.” – ASTM C270 Standards
Preservation vs. Destruction: The Final Verdict
Don’t be fooled by the allure of porous stone sealers as a ‘fix’ for bad masonry. A sealer is a top-coat, not a structural bond. If your joints are failing, no amount of chemical spray will save the wall. You must address the underlying issues: whether it is the lack of weep holes in a brick veneer or the shifting soil causing a stair-step crack that requires a structural masonry inspection. A master mason doesn’t just look at the crack; they look at the soil, the drainage, and the roofline. If you take the time to use the right tools—the hawk, the slicker, and the mortar gun—and respect the chemistry of the hydration process, your repairs will outlast you. If you cut corners, the freeze-thaw cycle will find your mistakes and tear them apart with the slow, patient strength of ice. Do it once, and do it right, because in the world of masonry, there are no shortcuts—only long-term failures.
{“@context”:”https://schema.org”,”@type”:”HowTo”,”name”:”Professional DIY Tuckpointing”,”step”:[{“@type”:”HowToStep”,”text”:”Clean the joints to a depth of at least 1 inch using a hammer and chisel or a diamond blade grinder.”},{“@type”:”HowToStep”,”text”:”Hydrate the masonry by misting it with water to prevent the brick from sucking the moisture out of the new mortar.”},{“@type”:”HowToStep”,”text”:”Mix your mortar to a stiff, peanut-butter consistency and place a mound on the hawk.”},{“@type”:”HowToStep”,”text”:”Use the slicker to pack the mortar into the joints in 1/4 inch lifts, pressing firmly to eliminate air pockets.”},{“@type”:”HowToStep”,”text”:”Wait for the mortar to become thumbprint hard, then strike the joint with a jointer tool to create a water-shedding profile.”}],”tool”:[{“@type”:”HowToTool”,”name”:”Mason’s Hawk”},{“@type”:”HowToTool”,”name”:”Tuckpointing Slicker”},{“@type”:”HowToTool”,”name”:”Mortar Gun”}]}