
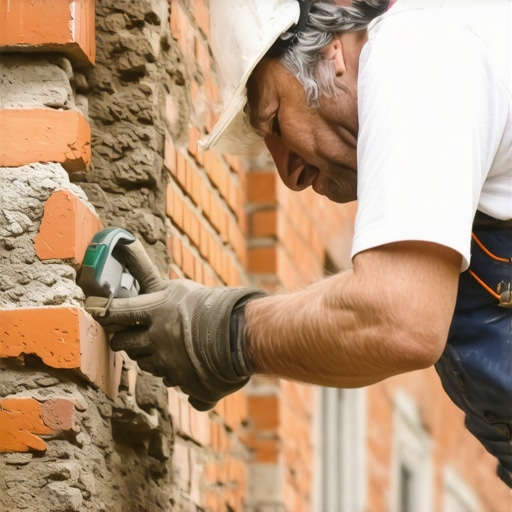
The Gritty Reality of the Rake: Why Your Tool Choice Is a Structural Decision
I remember the first time I saw a heritage facade ruined by a ‘speed-demon’ with a seven-inch angle grinder. He was tearing through the mortar joints of a 1910 Victorian like he was cutting pavement. Every time that diamond blade jumped—and it always jumps—it bit into the soft, fired skin of the brick. He didn’t just make the wall look like a serrated mess; he stripped away the protective vitrified surface that keeps water from turning a brick into a sponge. By the time I was called for a structural masonry inspection, the building was weeping red dust. The bricks were spalling, the ‘tooth’ of the material was gone, and the structural integrity was compromised. This is the cost of using the wrong tool for re-pointing services. Masonry isn’t just stacked rocks; it’s a living system of breathability and movement. When you go to rake out those joints, you aren’t just cleaning; you are performing surgery on a building’s skeleton.
“Water penetration is the single greatest threat to masonry durability. Proper joint preparation is the first line of defense.” – BIA Technical Note 7
The Physics of the ‘Skin’ and the Peril of Power
To understand why the tool matters, you have to understand the micro-anatomy of a brick. When a clay brick is fired in a kiln, the exterior surface—the ‘skin’—reaches the highest temperature and undergoes the most significant vitrification. This creates a dense, relatively water-resistant barrier. The interior of the brick, the ‘core,’ remains more porous. If you use a tool that nicks, gouges, or grinds that skin away, you expose the thirsty core. In a climate where we deal with freeze-thaw damage restoration, this is a death sentence. Water enters the core, expands by 9% when it freezes, and literally pops the face of the brick off in a process we call spalling. For a failing retaining wall repair, this damage is even more catastrophic because of the constant hydrostatic pressure pushing from behind the wall.
The Manual Arsenal: The Surgeon’s Scalpel
For high-stakes restoration, nothing beats the control of hand tools. The plugging chisel is my bread and butter. It’s a specialized tool with a fluted side that allows dust to escape the joint while you’re striking. Unlike a standard cold chisel, the plugging chisel is designed to minimize the shockwaves sent into the surrounding brickwork. When I’m training a new guy, I tell him to feel the ‘ring’ of the brick. A solid brick has a high-pitched resonance. If you’re using a hammer and chisel and the sound turns dull, you’ve hit a cold joint or a pocket of honeycombing where the internal structure has failed. We also use joint rakes—often called ‘skates’—which are wheels on a frame with a hardened pin. They allow for a consistent depth, usually 3/4 of an inch, ensuring the new mud has enough surface area to bond. This is critical when preparing for tuck pointing services or a brickwork pointing styles update where precision is everything.
The Mechanical Middle Ground: Pneumatic and Oscillating Tools
When the job is too big for a chisel but too delicate for a grinder, we turn to the pneumatic air-chisel. These tools use high-frequency, low-impact vibrations. They don’t ‘cut’ the mortar so much as they shatter the bond between the mortar and the brick through resonance. This is the safest way to handle brick veneer detachment repair on a large scale. By adjusting the PSI, you can dial in the force to match the hardness of the mortar. If I’m working on a retaining wall batter correction where the wall is leaning and the joints are already stressed, I don’t want the violent torque of a circular blade. I want the surgical precision of an oscillating tool with a carbide-grit blade. These blades don’t spin; they vibrate back and forth at 20,000 OPM (oscillations per minute). They allow you to get into the ‘perps’—the vertical joints—without over-cutting into the soldier course above or below.
“Mortar should always be weaker than the masonry units it binds. A mortar that is too hard will cause the brick to fail during thermal expansion.” – ASTM C270 Standard Specification
The Grinder: A Necessary Evil
I hate grinders, but they have their place in modern, high-production re-pointing services—if used with a vacuum shroud and a steady hand. If you must use a grinder, you never use a standard masonry blade. You use a specialized diamond ‘tuckpointing blade’ that is 1/4 inch thick. This allows you to clear the joint in a single pass. However, the rule is strict: you never go full depth with a grinder. You use the grinder to ‘score’ the center of the joint, relieving the tension, and then you finish the edges with a hand chisel to preserve the brick’s arrises. This is especially true when doing an outdoor fireplace rebuild where the thermal stress is already high. You can’t afford any micro-cracks in the brick edges. If you’re dealing with chimney flashing repair, the grinder is often necessary to cut the reglet for the new lead or copper, but again, precision is the difference between a dry house and a moldy attic.
Suction, Saturation, and the ‘Mud’ Bond
Once the joint is raked, the work isn’t done. The most common mistake I see is ‘buttering’ a dry joint. If the brick is dry, it will suck the moisture out of your new mortar instantly, preventing proper hydration. We call this ‘burning’ the joint. The mortar will look fine for a week, then crumble like a dry biscuit. Before we apply the new mud with a hawk and slicker, we saturate the wall. The bricks should be ‘surface dry’ but internally damp. This ensures the mortar cures from the inside out, creating a monolithic bond. This is the secret to retaining wall batter correction that lasts fifty years instead of five. You have to respect the chemistry of the lime. In historic work, we avoid Portland cement because it’s too hard and dense. We use Type N or Type O lime-based mortars that allow the wall to ‘breathe’ and move without cracking.
Final Assessment: Doing It Once or Doing It Twice
Whether you are looking at a failing retaining wall repair or a delicate outdoor fireplace rebuild, the tool you choose for the rake-out dictates the lifespan of the structure. A cheap contractor will show up with a grinder and no vacuum, leaving your house covered in silica dust and your bricks scarred. A master mason shows up with a bucket of chisels, a pneumatic kit, and a deep understanding of the building’s original ‘recipe.’ Don’t let a ‘handyman special’ turn your heritage home into a maintenance nightmare. Raking is the foundation of the repair; if the foundation is scarred, the finish will never hold. Do it right, respect the ‘tooth’ of the stone, and remember: the mortar is sacrificial, but the brick is forever.