
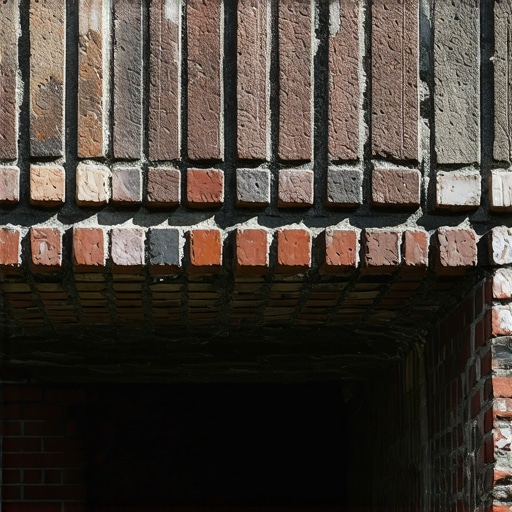
The Forensic Scene: Beneath the Hairline Crack
The homeowner thought it was just a hairline crack. But when I put my scope inside, I saw the structural steel was rusted to dust. To the untrained eye, a diagonal fracture across a soldier course looks like a house ‘settling.’ To a third-generation mason, it looks like a ticking time bomb. This wasn’t a foundation issue; it was a total failure of the masonry lintel—the horizontal steel member that carries the thousands of pounds of brick over a window or door opening. When that steel loses its structural integrity due to oxidation, the brickwork above it has nowhere to go but down. In this specific case, we were looking at a classic example of ‘rust jacking.’ As steel corrodes, it expands up to seven times its original thickness. This expansion exerts incredible hydrostatic-like pressure against the surrounding mortar and brick, eventually snapping the bonds and causing the tell-tale stair-step cracking. We didn’t need a full tear-down, but we needed surgical precision.
“Water penetration is the single greatest threat to masonry durability.” – BIA Technical Note 7
The Physics of Lintel Failure and Thermal Expansion
In our northern climate, the freeze-thaw cycle is the primary antagonist. Water enters through microscopic voids in the commercial tuckpointing, hits the cold steel lintel, and stays there. When the temperature drops, that water expands by 9%, turning into ice and prying the mortar joints apart. This creates a cycle where more water enters each year, accelerating the corrosion of the steel. In this project, we also had to account for the metallic brick colors application used on the accent rows. These metallic masonry finishes have a different thermal absorption rate than standard clay. They get hotter in the direct sun, leading to increased thermal expansion. Without proper relief joints or a high-performance mortar mix that can handle the slight movement, the bricks will spall—popping their faces off because they have nowhere to expand but outward.
The Solution: Structural Restoration Without the Tear-Down
The ‘handyman special’ approach is to smear some caulk in the crack and walk away. That’s a death sentence for the wall. Our forensic approach involved a method of ‘surgical steel replacement.’ First, we installed temporary shoring to take the load of the upper stories. Then, we carefully removed the soldier course bricks, using a masonry birdsmouth cut where the lintel met the corner to ensure we didn’t disturb the interlocking bond of the main wall. We discovered the original builder had failed to install any flashing or weep holes—a cardinal sin in professional masonry restoration. Without a way for moisture to escape, the steel was essentially sitting in a bathtub. We replaced the rusted angle iron with a hot-dipped galvanized member. Before laying the brick back in, we applied a foundation waterproofing membrane behind the first course, directing any internal moisture toward new cellular weep holes. This ensures that even if water gets behind the facade, it has an exit strategy.
The Chemistry of High-Performance Mortar Mixes
You can’t just throw any ‘mud’ into an old wall. We used a custom high-performance mortar mix designed to match the compressive strength of the existing units. Using a mortar that is too hard—like a modern Type M high-strength cement on older, softer bricks—will cause the bricks to crush themselves during thermal expansion. We opted for a Type N lime-based mix, which offers better ‘autogenous healing’ properties. This means if small hairline cracks develop, the lime can actually migrate and reseal the void over time. While the mortar was still ‘green,’ we used a slicker to strike the joints, ensuring a tight seal against the brick edges. We didn’t just butter the bricks; we ensured full head-joint saturation to prevent future water entry. This is the difference between a 5-year fix and a 50-year restoration.
“Mortar should always be weaker than the masonry units it binds, acting as the sacrificial element in the wall system.” – ASTM C270 Standards
Completing the Envelope: From Chimneys to Foundations
While we were on the scaffolding, the forensic inspection continued. We found the chimney sweep and repair was long overdue; the crown was cracked, allowing water to pour down the center of the stack, which often manifests as dampness in the basement. We integrated self-healing concrete foundations technology for the minor floor cracks we found below, but the primary focus remained the moisture envelope. A thorough facade cleaning was performed using a low-pressure chemical wash to remove decades of carbon crust and salts (efflorescence) that trap moisture against the brick. By restoring the breathability of the masonry, we ensure that the entire structural system can dry out after a rain event, preventing the spalling and honeycombing that leads to total facade failure. Do it once, or do it twice—that’s the mantra of the Master Mason. We chose to do it right.