The Hardscape Truth: Why Your Slab is Slumping
Most homeowners look at a sinking concrete walkway and see a trip hazard. I see a failure of physics and a betrayal of the sub-base. When you walk out your front door and feel that sickening rock under your boots, you’re witnessing the endgame of poor soil management. My old mentor, a man who treated his level like a sacred relic, once told me that concrete is just a rigid skin over a living, breathing earth. He’d say, ‘If the dirt is lazy, the slab will follow.’ He wasn’t talking about the concrete itself; he was talking about the compaction, the ‘Proctor density’ that determines if a walkway stays true or turns into a series of jagged islands. Most ‘handyman specials’ involve throwing some patch over the crack, but that’s just putting a bandage on a broken leg. To fix this without the massive expense of a full tear-out, we have to look into the geotechnical gut of the problem.
“Surface water runoff and subsurface moisture are the primary catalysts for soil instability in residential hardscapes.” – ASTM International C94/C94M
In our region, the enemy is usually the freeze-thaw cycle. Water is a relentless force. It finds its way into the voids beneath your walkway through micro-cracks or poorly managed drainage. When the temperature drops, that water expands by 9% in volume. This isn’t just a gentle push; it’s a hydraulic jack from within the soil. This expansion heaves the slab upward, and when the thaw comes, the water retreats, leaving behind a cavernous void. Over time, the soil particles—often a mix of silt and clay—lose their friction and wash away. This is where we see the classic ‘honeycombing’ of the sub-grade, where the structural integrity of the base is replaced by air pockets. If you’ve noticed your brickwork pointing styles looking ragged or your stone facade restoration projects failing at the ground level, it’s all part of the same geotechnical drama. The ground is moving, and your masonry is just the victim.
The Forensic Inspection: Sifting Through the Silt
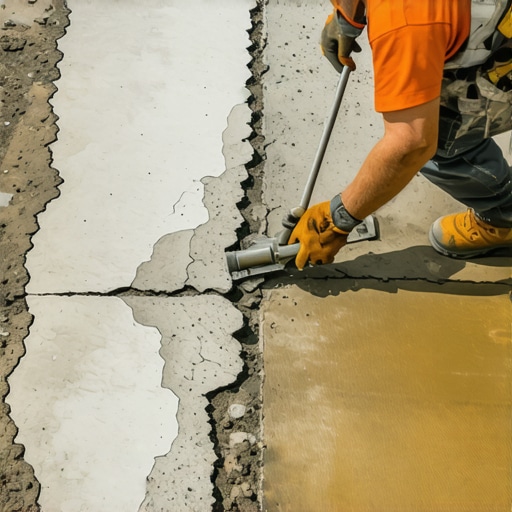
Before we even touch a ‘hawk’ or a bag of ‘mud,’ we have to diagnose the settlement. Is it a uniform sink, or is the slab tilting toward the foundation? If it’s tilting toward the house, you’ve got a recipe for a damp basement and foundation rot. This is often where I find that chimney leak detection is necessary elsewhere on the property, as the same drainage failures affecting the walk are likely compromising the chimney’s shoulder or crown. I’ve spent years looking for the ‘cold joint’—that weak point where two pours didn’t bond—and usually, that’s where the failure starts. We aren’t just looking for cracks; we’re looking for ‘suction’ in the soil and evidence of hydrostatic pressure. If the concrete was poured during a ‘flash set’ in the heat of summer without proper hydration, the slab itself might be brittle, making a simple lift more precarious. [image_placeholder_1]
Slab Jacking vs. Polyurethane Injection: The Chemical Cure
Traditional ‘mudjacking’ uses a slurry of Portland cement, sand, and soil—literally a heavy mud—pumped through large holes drilled in the slab. It works, but it’s heavy. You’re adding more weight to the very soil that already failed to support the original slab. That’s why I prefer modern geotechnical foam. We drill tiny, 5/8-inch holes—barely the size of a dime—and inject a two-part high-density polyurethane. When those two liquids meet under the concrete, a chemical reaction occurs. They expand, creating a closed-cell structure that is incredibly light but capable of lifting thousands of pounds. This foam doesn’t just fill the void; it compacts the surrounding soil, increasing its load-bearing capacity. It’s like ‘buttering’ a brick but on a massive, subterranean scale. Unlike traditional materials, this foam is a form of sustainable masonry materials usage because it prevents the waste of a perfectly good slab going to a landfill. It cures in minutes, not days. You can walk on it before I’ve even finished packing my truck.
“The longevity of any masonry repair is directly proportional to the moisture resistance of the interface between the unit and its substrate.” – BIA Technical Note 28
During the lift, we monitor the slab with laser levels. We aren’t just looking for height; we’re looking for the ‘ring’ of the concrete. If a slab sounds hollow when you tap it with a hammer, it’s still unsupported. We want that solid, thudding sound that tells us the foam has permeated every ‘honeycomb’ in the sub-base. Once the slab is level, we address the aesthetic and structural finish. This is where flush pointing services come into play for the joints between the walkway and any adjacent brickwork. We use a ‘slicker’ to joint the gaps, ensuring a tight seal against future water ingress. If the walkway is part of a historic home, we might even use historic brick salvage to repair the edges, ensuring the ‘tooth’ of the new mortar bonds perfectly with the old, weathered surfaces. We avoid the hard, high-Portland mixes that cause spalling in older materials, opting instead for Type N or O mortars that allow for natural movement.
The Preventive Strike: Maintaining the Grade
Once we’ve lifted the slab, the job isn’t done. If you don’t fix the drainage, I’ll be back in five years. You need to look at your gutters and downspouts. Are they dumping water right at the edge of the walk? That’s a death sentence for concrete. I often see homeowners spend thousands on a stone facade restoration only to let a $10 downspout extension ruin the foundation. We also look at the structural brick ties replacement if the sinking walkway was a sign of larger building movement. A sinking walk is like a fever; it’s a symptom of a deeper infection. You check for chimney sweep and repair needs at the same time because freeze-thaw damage restoration isn’t limited to the ground. It climbs. It attacks the chimney crown, the mortar joints, and the brick veneer installation. By sealing the cracks in the walkway with a high-grade architectural sealant, we prevent the ‘wicking’ action that pulls water back under the slab. Do it once, do it right, and you won’t have to watch your money sink into the dirt again.