The Forensic Reality of the ‘Wet Wall’ Crisis
I was standing on a scaffolding forty feet up a commercial facade in the dead of February when I saw it: a tiny trail of white salt—efflorescence—bleeding from a joint that looked perfectly fine to the untrained eye. The owner thought they just needed a quick wash. But when I took my hammer and tapped the soldier course, the sound wasn’t the crisp ‘clink’ of solid masonry. It was a dull, wet thud. That’s the sound of a structural disaster in progress. When I finally cut into that wall, the galvanized wall ties didn’t just break; they turned to red dust in my fingers. The moisture wasn’t just ‘there’—it was an ecosystem that had been eating the building’s skeleton for a decade.
Brick veneer is one of the most misunderstood systems in modern construction. Most people see a solid wall. As a forensic inspector, I see a rainscreen that is failing its primary job. The tragedy of modern ‘lick-and-stick’ or poorly executed veneer is that it creates a pressurized chamber for water. If your foundation waterproofing isn’t integrated with the masonry drainage plane, you aren’t building a home; you’re building a vertical swamp. We need to talk about the physics of the cavity, the chemistry of the mud, and why your masonry is literally choking to death behind a mask of ‘aesthetic’ perfection.
“Water penetration is the single greatest threat to masonry durability. Proper drainage systems, including weep holes and flashing, are essential to redirecting moisture to the exterior.” – BIA Technical Note 7
The Physics of the 9% Expansion: Why Spalling Happens
In the northern freeze-thaw zones, moisture is a ticking time bomb. When water gets trapped in the wythe of the brick, it waits for the temperature to drop. As that water transitions to ice, it expands by exactly 9%. That pressure is immense. It’s enough to blow the face off a hard-fired clay brick. This is what we call brick spalling prevention failure. If you use a high-strength Portland cement on an old, soft brick, the mortar becomes the strongest part of the wall. That’s a crime. The mortar should be the sacrificial element. When the ice expands, you want the mortar to give way, not the brick. But when moisture is trapped behind the veneer because of a lack of ventilation, the brick has nowhere to go but out. It pops. It flakes. It dies.
I’ve seen commercial masonry facade maintenance programs that consist of nothing but slapping clear sealer over everything. That is the worst thing you can do. You’re effectively shrink-wrapping a wet sponge. The water gets in through capillary action—the ‘wicking’ effect where the brick sucks up ground moisture—and then it’s trapped by the sealer. The sun hits the wall, turns that water into vapor, and the vapor pressure blows the brick apart from the inside out. Real structural masonry inspection requires looking for these hydrostatic traps before they become catastrophic failures.
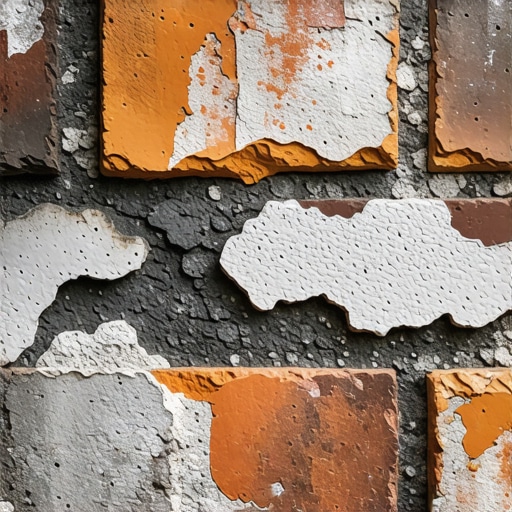
The Art of the Joint: More Than Just ‘Slicking’ Mud
Let’s talk about brickwork pointing styles. I see a lot of ‘handyman specials’ where they use a flush pointing services approach on a wall that was never designed for it. A flush joint, if not struck with the right pressure, allows water to sit on the ledge of the brick. You want a concave joint—a ‘slicked’ joint—that compacts the mortar and creates a physical shape that sheds water like a duck’s back. When we perform tuckpointing, we aren’t just making it look pretty. We are restoring the hydraulic integrity of the wall. We rake out the old, crumbling mud to a depth of at least 3/4 of an inch and ‘butter’ the joints with a mortar that matches the original’s compressive strength and vapor permeability.
“Mortar should be selected based on the properties of the masonry units. A mortar that is too strong can cause the units themselves to fail during thermal expansion or moisture cycles.” – ASTM C270 Standards
On larger scales, like commercial smokestack repair, the stakes are even higher. A smokestack is a giant straw for moisture. The temperature differential between the inside flue and the outside air creates a constant dew point within the masonry. If the chimney damper repair wasn’t handled or the crown is cracked, you’re funneling gallons of water into the core of the structure. I’ve seen stacks where the interior soot mixed with moisture to create a mild sulfuric acid that ate the mortar from the inside out. You don’t fix that with a 3D printed masonry repairs gimmick; you fix it with deep-tissue restoration and proper venting.
The High-Tech vs. The High-Craft
I hear a lot about 3D printed masonry repairs these days. While the tech is interesting for creating custom shapes, it can’t replace the ‘tooth’ of a hand-spread bed of mortar. The bond between the mortar and the brick is a chemical dance. It requires the right ‘suction.’ If the brick is too dry, it sucks the water out of the mortar too fast—we call that ‘burning’ the mud. If the brick is too wet, the mortar just floats and never grabs. A master mason knows the ‘feel’ of the suction by touching the brick to his tongue or splashing a drop of water on it. You can’t program that into a robot yet.
When it comes to foundation waterproofing, the transition from the ground to the first soldier course is where most contractors fail. They stop the waterproofing at the grade line. But moisture doesn’t respect the grass line. It moves up through capillary rise. You need a through-wall flashing that acts as a physical dam, forcing that water out through the weep holes. If I don’t see those weeps, I know I’m looking at a wall that is rotting its own studs. Whether it’s a chimney damper repair or a full commercial masonry facade maintenance project, the goal is always the same: let the masonry breathe. Stop trying to seal it. Start trying to drain it. If you don’t do it right the first time, the physics of water will eventually tear your house down, one frozen pore at a time.
The Final Inspection: Don’t Ignore the Hairlines
If you see a stair-step crack following the mortar joints, the house is telling you its feet are sore—the soil is shifting. But if you see a horizontal crack, especially at the top of a wall, that’s the sound of the wall bowing under the weight of trapped water and rusted ties. That is a 911 call for a mason. Don’t let a ‘painter’ fill it with caulk. Caulk is the enemy of masonry. It traps the breath of the stone. You need a structural masonry inspection that looks at the heart of the cavity. You need to know if your ties are still there, or if they’ve been sacrificed to the god of dampness. Do it once, do it right, and use a slicker to finish those joints like someone who actually gives a damn about the next hundred years.
[{“@context”:”https://schema.org”,”@type”:”HowTo”,”name”:”How to Prevent Moisture Trapping in Brick Veneer”,”step”:[{“@type”:”HowToStep”,”text”:”Conduct a structural masonry inspection to identify blocked weep holes or cracked mortar joints.”},{“@type”:”HowToStep”,”text”:”Rake out failing mortar to a depth of 3/4 inch using hand tools or a diamond blade grinder for tuckpointing.”},{“@type”:”HowToStep”,”text”:”Select a mortar mix (Type N or O) that is softer than the existing brick to ensure the mortar remains the sacrificial element.”},{“@type”:”HowToStep”,”text”:”Dampen the bricks to manage suction and prevent ‘burning’ the new mud.”},{“@type”:”HowToStep”,”text”:”Apply new mortar using a hawk and trowel, then use a slicker to create a concave joint for optimal water shedding.”}]}]