The Forensic Scene: When a Hairline Crack Becomes a Structural Grave
The homeowner stood in a damp basement, pointing at a single, thin line running diagonally across the CMU block wall. ‘It’s just a little dampness,’ they said. ‘Maybe some epoxy will fix it.’ But when I slid my fiber-optic scope into a weep hole and peered into the core, I didn’t see concrete or stone; I saw the ghost of structural integrity. The horizontal reinforcement steel—the rebar that gives a wall its tensile strength—wasn’t just rusted; it was gone, reduced to a pile of orange dust that looked like a spilled bag of cinnamon. The water hadn’t just ‘seeped’ in; it had been conducting a slow-motion chemical heist for thirty years. This is the reality of masonry forensics. What you see on the surface is rarely the whole story. Whether you are dealing with a 19th-century brick infill panel repair or a modern poured foundation, water is a patient predator. It doesn’t just want to get inside; it wants to return your home to the earth. To stop it, we have to talk about the physics of the ‘pore’ and the relentless push of hydrostatic pressure.
“Water penetration is the single greatest threat to masonry durability, leading to efflorescence, freeze-thaw damage, and structural degradation.” – BIA Technical Note 7
The Physics of the Push: Why Your Basement is Leaking
Before we talk about full repointing services or drainage, you need to understand why the water is there. Your foundation is a boat hull sitting in a sea of dirt. When it rains, the soil becomes saturated. This creates hydrostatic pressure—a physical force that pushes against your walls with thousands of pounds of weight. In the North, where we deal with heavy clay soils, this pressure is exacerbated by the freeze-thaw cycle. Water expands by roughly 9% when it turns to ice. If that water is trapped inside the microscopic pore structure of your mortar or behind a stone coping installation, it creates internal tensile stress that no masonry can withstand. The result is ‘spalling,’ where the face of the brick or stone literally pops off, leaving the soft inner core exposed to the elements. This is why masonry cleaning isn’t just about aesthetics; it’s about removing the salts that trap this moisture in the first place.
1. The Exterior Barrier: The Only True ‘Stop’
If you want to stop seepage for good, you have to fight the battle on the outside. This involves excavating down to the footer and applying a high-performance elastomeric membrane. This isn’t just ‘tar’—modern forensics dictates a multi-layered approach. We start with a parge coat of Type S mortar to smooth the surface, then the membrane, and finally a dimpled drainage board. This board creates an air gap, breaking the capillary suction and allowing water to fall straight down to the perimeter drain. This is the same principle we use in commercial parapet wall repair: you must give the water a path of least resistance that leads away from the structural core. If you don’t address the exterior, you are simply managing a leak, not stopping it.
2. Capillary Breaks and the Chimney Connection
Many homeowners are surprised to find that basement seepage actually starts at the roofline. I’ve seen water travel down the interior of a chimney flue, bypass the chimney repair services on the upper floors, and pool at the base of the foundation. A missing or cracked chimney cap replacement allows gallons of water to enter the masonry stack. Because masonry is porous, it acts like a wick. This ‘capillary action’ can pull water horizontally through a wall and vertically up from the footer. Installing a proper stone coping installation or a stainless steel chimney cap creates a ‘drip edge’ that sheds water away from the masonry face, preventing the saturation that leads to basement seepage.
3. The Sacrificial Principle: Historic Tuckpointing
If you live in a home built before 1940, your basement might be made of soft-fired clay brick or fieldstone. In these cases, the worst thing you can do is use modern Portland cement to ‘fix’ a leak. Old masonry must breathe. If you butter a joint with hard cement, the moisture gets trapped in the soft brick. When the temperature drops, the brick explodes, not the mortar. This is where historic tuckpointing comes in. We use lime-based mortars that are softer than the brick itself. The mortar acts as the ‘sacrificial lamb,’ allowing moisture to evaporate through the joints while keeping the structural units intact. For brick arch restoration, this is non-negotiable. The physics of the arch relies on the even distribution of compression; a hard, brittle joint will cause the arch to pinch and eventually collapse.
“The mortar should always be weaker than the masonry units so that any movement or thermal expansion is accommodated within the joints.” – ASTM C270 Standards
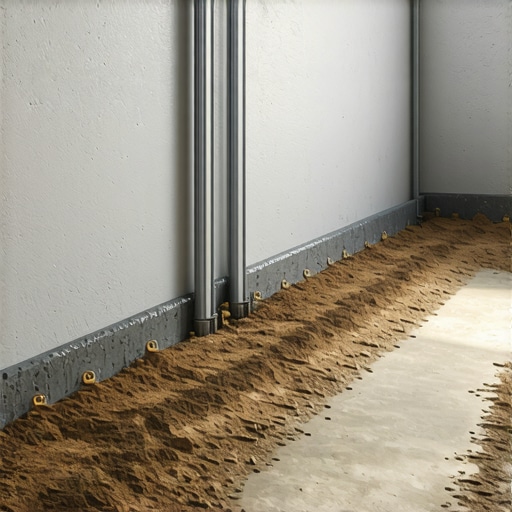
4. Managing the ‘Mud’: Internal Drainage Systems
Sometimes, excavation isn’t an option—maybe there’s a driveway or a historical facade in the way. In these scenarios, we move to internal management. This involves cutting a trench in the floor and installing an interior perimeter drain. But here is the forensic catch: you must address the ‘honeycombing’ in the concrete. When concrete is poured too quickly or not vibrated properly, air pockets form. These pockets become reservoirs for water. To stop seepage, we often use a crystalline waterproofing agent. These chemicals migrate into the pores of the concrete and grow microscopic crystals that block the path of water, effectively turning the wall itself into a barrier. This is a far cry from a ‘handyman special’ coat of waterproof paint that will just bubble and peel within a year.
5. The Hardscape Truth: Retaining Walls and Grading
Finally, we look at the ‘surround.’ If your retaining wall capstone replacement was done poorly, or if the soil has settled towards the house, you are essentially funnelling water into your basement. A retaining wall is a dam; it needs ‘weep holes’ to relieve pressure. If those holes are clogged with ‘mud’ or were never installed, the wall will tilt and eventually fail. We see the same thing with brick infill panel repair in urban environments; when the sidewalk settles, it directs runoff into the foundation. Correcting the grade and ensuring all horizontal surfaces—from window sills to stone coping installation—have a positive pitch away from the structure is the most cost-effective forensic fix in the book. If you don’t fix the grade, you are just waiting for the next ‘hundred-year storm’ to prove you wrong.
Conclusion: Do it Once, or Do it Twice
Stopping basement seepage isn’t about buying a bucket of sealant at a big-box store. It’s about understanding the chemical relationship between lime, silica, and H2O. It’s about knowing when to use a ‘slicker’ to pack a joint tight and when to let a wall breathe. Whether you need full repointing services or a complex brick arch restoration, the goal is the same: permanent moisture management. Don’t wait until the ‘hairline crack’ reveals a rusted-out skeleton. Address the physics of your foundation today, and you won’t have to call me for a forensic autopsy of your home tomorrow.