The Crack Whisperer’s Guide to Structural Integrity
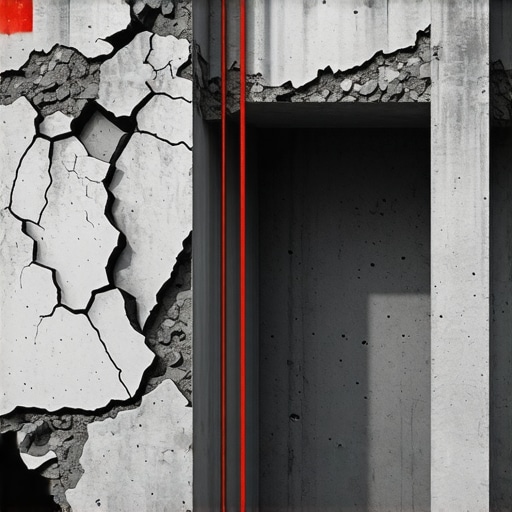
I remember a brownstone in Boston where the homeowner pointed to a thin fissure near the water table. To the untrained eye, it looked like a standard settlement line, something you’d ignore for another decade. But when I put my borescope inside that void, I didn’t see brick and mortar; I saw the structural steel was rusted to dust, expanded to three times its original thickness through oxide jacking. That ‘hairline’ crack was the last gasp of a dying support system. In the world of forensic masonry, we don’t look at the surface; we look at the physics of failure. Whether you’re dealing with historic brick salvage or modern high-performance mortar mixes, the signs are always there if you know how to read the language of the stone.
1. The Stair-Step Crack: Differential Settlement in the Bed Joint
When you see a crack zig-zagging through the mortar joints like a lightning bolt, you’re looking at differential settlement. This isn’t just ‘house settling’—it’s the ground literally moving out from under the soldier course. In the North, this is often driven by the freeze-thaw cycle. Water penetrates the soil, expands 9% upon freezing, and heaves the footer. When it thaws, the soil loses its density, leaving a void. The masonry, being a rigid assembly, cannot flex. Instead, it shears at the weakest point: the bond between the mud and the unit.
“Water penetration is the single greatest threat to masonry durability. Proper drainage and moisture management are paramount to structural longevity.” – BIA Technical Note 7
To fix this, we don’t just ‘butter’ the joint. We look at foundation helical pier installation. We drive steel shafts deep into the load-bearing strata, bypassing the volatile surface soil. This is the difference between a ‘handyman special’ and structural masonry inspection that actually saves a building. If you’re attempting a brick patio restoration alongside these repairs, remember that the same soil physics apply to your pavers—without a compacted aggregate base, your hardscape will look like a topographical map of the Andes in two seasons.
2. Horizontal Bulging and Hydrostatic Pressure
A horizontal crack running along a mid-wall mortar joint is a red flag for hydrostatic pressure. This is a common forensic scene in basements. Saturated soil weighs significantly more than dry soil, and it exerts lateral force against the foundation. In historic restoration, using modern Portland-heavy high-performance mortar mixes can actually accelerate this failure. Old walls need to breathe. If you plug a lime-based wall with a hard, impermeable Type S mortar, you trap moisture within the brick core. During the freeze-thaw cycle, that trapped water pops the face off the brick—a process called spalling.
For these curved walls or complex geometries, tuckpointing curved walls requires a softer touch. We often use Type O or Type N lime-based mortars that act as a ‘sacrificial’ element. The mortar should always be softer than the brick. When the wall moves, the mortar cracks, not the historic brick salvage. This preserves the structural unit while allowing for easy maintenance later. For emergency masonry repair, we might even utilize self-leveling masonry lifts to stabilize a section before the lateral pressure causes a total blow-out.
3. The Sheared Corner: Thermal Expansion and Lack of Control Joints
In hotter climates or south-facing walls, thermal expansion is the silent killer. A 100-foot masonry wall can expand by over half an inch during a summer day. Without proper control joints, the wall will find its own relief point, usually by shearing the corner off. You’ll see vertical cracks near the ends of the wall or at the corners of stone balustrade restoration projects. The physics here is simple: heat increases molecular vibration, the material expands, and the compressive strength of the masonry is overcome by the tensile stress.
“All masonry should be designed to accommodate the inevitable movement caused by temperature changes, moisture content, and structural loading.” – ASTM C270 Standards
When I’m on a job site, I check the ‘tooth’ of the stone. If the surface is too smooth, the mortar won’t grab. We use a slicker to strike the joints properly, ensuring the mud is compacted. This compaction is critical for water shedding. If the joint is ‘honeycombed’—full of small air pockets—water will sit in those voids, freeze, and blow the joint apart from the inside out.
4. Efflorescence and Mineral Leaching
That white, powdery substance you see on walls isn’t just ‘salt.’ It’s the visual evidence of a moisture problem. It’s called efflorescence. Water travels through the masonry, picks up soluble salts, and deposits them on the surface as it evaporates. While it looks like a cosmetic issue, it often points to a failure in the flashing or the coping. In stone balustrade restoration, we often find that internal anchors are rusting, and the salts are leaching out from the core. Masonry cleaning isn’t just about aesthetics; it’s about removing these salts before they crystallize inside the pores (sub-fluorescence), which can cause internal crumbling of the stone.
5. Sagging Lintels and Rusted Steel
If the bricks above your windows look like they’re dipping, your steel lintel is failing. Steel and masonry have different expansion rates. When that steel gets wet, it oxidizes. Rust occupies significantly more volume than the original steel. This ‘oxide jacking’ lifts the courses of brick above it, creating a ‘stair-step’ crack away from the window corners. This is a critical structural masonry inspection point. We don’t just scrape and paint. We often have to remove the soldier course, replace the lintel with galvanized steel, and reinstall the brick using high-performance mortar mixes that include air-entraining agents to resist future water damage.
The Forensic Verdict
Don’t be fooled by a fresh coat of paint or a quick ‘lick-and-stick’ veneer. True masonry is an assembly of chemistry, physics, and grit. Whether you are performing historic brick salvage or an emergency masonry repair on a failing footer, you have to respect the materials. The ‘mud’ has to be mixed to the right consistency on the hawk; it has to have the right ‘suction’ when it hits the brick. If you ignore these red flags, you aren’t just looking at a crack; you’re looking at the eventual collapse of your investment. Do it once, do it right, and use the materials the building demands, not what’s cheapest at the big-box store.