
The Ghost in the Wall: Understanding the Decay of Historic Facades
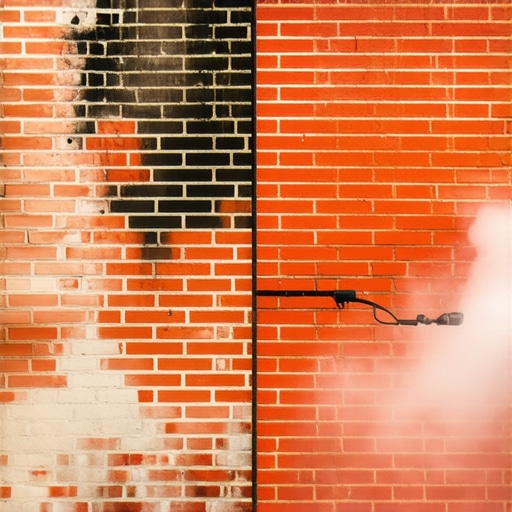
When you walk up to a row of 19th-century brickwork that looks like it’s been dipped in ink, you aren’t just looking at dirt. You’re looking at a record of atmospheric chemistry and a slow-motion structural failure. Most homeowners see a blackened facade and think ‘pressure washer,’ but as a third-generation mason, that thought makes my skin crawl. That black crust is often a gypsum skin, a byproduct of sulfur dioxide from old coal smoke reacting with the calcium carbonate in the mortar and the brick itself. If you hit that with 4,000 PSI of water, you’re not cleaning it; you’re skinning it alive. Once you blast off the ‘fire-skin’—that hard, vitrified outer layer of the brick—the soft, porous interior is exposed to the elements, and the building is on a fast track to masonry water damage repair that will cost ten times the original cleaning budget.
My uncle used to have a rule when we were doing historic brick salvage on old mills. He’d walk up to a wall, lick his thumb, and press it against a bare brick. He’d count. If the moisture from his thumb didn’t disappear within three seconds, the brick was ‘fat and happy.’ If it vanished instantly, the brick was ‘thirsty’ and would suck the water right out of your mud, leading to a flash-set and a brittle joint. This isn’t just old-timer superstition; it’s the physics of Initial Rate of Absorption (IRA). Understanding how a brick breathes is the difference between a restoration that lasts a century and one that fails before the check clears.
“The use of mortars with high compressive strength in historic masonry can lead to accelerated deterioration of the brick units. The mortar must always be weaker than the surrounding masonry units to act as a sacrificial element.” – BIA Technical Note 1
The Forensic Anatomy of Darkened Brick
Why do bricks turn dark? In the North, it’s usually a combination of biological growth (algae and lichen) and carbon crusting. The micro-pores of the brick act like a sponge for urban pollutants. When moisture enters the wall and cannot escape—perhaps because some ‘handyman’ applied a cheap silicone sealer—it pushes those pollutants to the surface as it evaporates. This is why tuckpointing weatherproofing is so misunderstood. You aren’t trying to seal the wall like a plastic bag; you’re trying to manage the ‘vapor drive.’ The masonry damage assessment must begin with a pH test of the surface. If you’re dealing with a carbon crust, you need a chelated detergent or a mild acidic wash, never a straight muriatic acid bath which can cause ‘iron staining’ or ‘manganese flickering’ that turns your red bricks a sickly purple-brown.
The Restoration Reality: Why ‘Butter’ Matters
When we talk about emergency masonry repair for a weathered wall, we are often talking about the failure of the joints. If the mortar is crumbling, the bricks are taking the load they weren’t designed for. A proper restoration requires grinding out the old, failing mud to a depth of at least 2 to 2.5 times the joint width. You don’t just ‘smear’ new stuff over the old; that’s called ‘overpointing’ and it’s a death sentence for the wall. You have to butter the joints carefully, packing the mortar in ‘lifts’ or layers. This prevents shrinkage cracks. We use a slicker or a jointer tool to strike the joint, compressing the molecules of the mortar to create a ‘tighter’ surface that sheds water.
In historic brick salvage, we often find that the original lime mortar has a high degree of autogenous healing. This means that when a microscopic crack forms, moisture dissolves a small amount of free lime and redeposits it into the crack, effectively ‘healing’ the joint. Modern Portland cement doesn’t do this. It’s too hard, too brittle, and lacks the breathability required for old hand-molded bricks. If you use a high-strength Type S mortar on a 100-year-old wall, the bricks will expand during a summer heatwave, hit the immovable wall of the hard mortar, and the faces will ‘spall’ or pop off. Now you’ve got a real masonry water damage repair nightmare on your hands.
“Water penetration is the single greatest threat to masonry durability. Managing this through proper joint profiles and material selection is paramount.” – ASTM C270 Commentary
Hardscape Truths and Retaining Wall Physics
Weathering doesn’t stop at the eye-line. A blackened wall often has a failing base. I’ve seen retaining wall installation projects where the contractor didn’t account for hydrostatic pressure. They built a beautiful stone face but forgot the ‘weep holes’ and the aggregate drainage behind it. The result? A failing retaining wall repair job where the entire mass is leaning four inches out of plumb because the soil behind it is saturated and heavy as lead. We often have to use concrete pump masonry mixes to stabilize the core of these walls, but the exterior must still be handled with the delicacy of a surgeon. The same goes for masonry joint sand repair on patios. If you use the wrong polymeric sand, you create a plastic-like film that traps water underneath, leading to ‘heaving’ when the first freeze-thaw cycle hits.
The Chimney Connection
A dark, damp-looking interior wall is often the result of a failed chimney. Chimney cap replacement is the most overlooked part of masonry maintenance. Without a proper ‘drip edge’ on the cap, water runs down the face of the brick, saturating the masonry and causing ‘efflorescence’—that white, salty powder that ruins the look of a restoration. The tuckpointing weatherproofing process must extend to the very top. If the ‘crown’ is cracked, you’re just pouring water into the heart of the structure. We see this constantly during a masonry damage assessment: the homeowner wants the front porch fixed, but the real enemy is the chimney three stories up, leaking water into the wall cavities and rotting the structural headers from the inside out.
Execution: The Restoration Protocol
Restoring darkened brick is a process of patience. First, we perform a ‘water soak’ to soften the soot. Then, we apply a restoration cleaner specifically formulated for the substrate. We use soft-bristled brushes—never wire brushes, which leave metallic fragments that rust and stain the brick. After cleaning, we evaluate the mortar. If it’s 19th-century brick, we’re mixing a Type O or a pure lime putty mortar. We match the color not with dyes, which fade, but by sourcing the correct color of local sand. The sand is the ‘skeleton’ of the mortar; the lime is the ‘glue.’ When we strike the joint with a slicker, we’re looking for that perfect ‘tooth’ that matches the original craftsmanship. This isn’t just about aesthetics; it’s about structural integrity. A wall that can breathe is a wall that will stand for another century. If you treat your masonry like a living thing, it’ll protect you. If you treat it like a ‘handyman special’ with a bucket of cheap cement, it’ll crumble under the weight of its own neglect.