
The Forensic Scene: When Geometry Goes Wrong
I walked onto a site in an old historic district where a ‘specialist’ was trying to wrap a structural steel column with high-fired modular brick. He was using a gas-powered demo saw with a dry blade, and the edges looked like they had been chewed by a rabid dog. The homeowner thought it was just ‘character,’ but when I put my scope inside the cavity, I saw the disaster waiting to happen. The jagged edges were catching water, the mortar wasn’t bedding properly because the cuts were uneven, and the structural steel was already showing signs of flash-rusting from trapped moisture. This wasn’t just an aesthetic failure; it was a forensic nightmare in the making. In the world of high-end masonry, especially when dealing with custom columns or tuckpointing curved walls, your cuts are the difference between a 100-year structure and a 5-year lawsuit.
The Physics of the Cut: Why Your Brick Chips
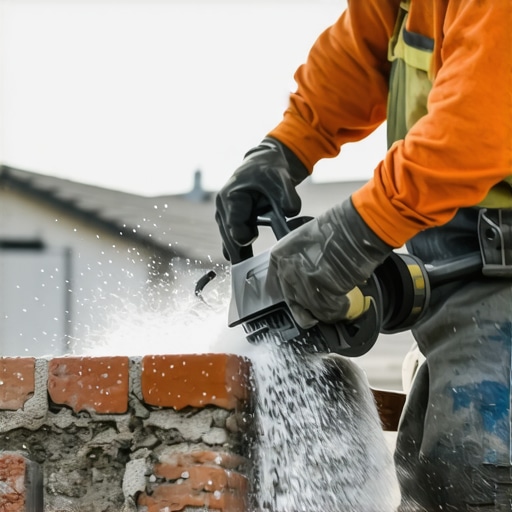
Most guys treat a brick like a piece of wood, but clay is a different beast entirely. When you hit a brick with a dry diamond blade, you are creating massive amounts of heat and vibration. This vibration travels through the clay matrix, causing micro-fractures that manifest as those ugly chips along the edge—what we call ‘spalling’ at the source. To get a cleaner way to cut brick angles, you have to understand the molecular vibration of the material. A dry blade has a wide kerf that hammers the brick. If you want a surgical edge for a custom column, you need a sliding table wet saw with a continuous-rim diamond blade. The water acts as a lubricant and a coolant, reducing the friction that leads to micro-cracking. This is critical when you’re working with sustainable masonry materials like reclaimed clay, which might already have a fragile internal structure from decades of exposure.
“Water penetration is the single greatest threat to masonry durability, often exacerbated by poor joint preparation and improper unit sizing.” – BIA Technical Note 7
The ‘Master Mason’s’ Setup for Custom Columns
To wrap a column perfectly, you aren’t just cutting 45s. You have to account for the ‘head joint’—that vertical slice of mud between the bricks. If you cut a hard 45-degree miter, you leave no room for the mortar to ‘tooth’ into the stone. I tell my apprentices to ‘butter’ the inside of the miter, but you need a 42-degree cut instead of a 45 to allow a small pocket for the mud to sit. This creates a mechanical bond that won’t pop when the sun hits that column and the thermal expansion kicks in. Speaking of thermal expansion, if you’re building in a climate with high heat, that column is going to grow. Without precise cuts and the right mortar, you’ll be looking for historic brickwork repointing services within three seasons. I always use a jig on the wet saw table to ensure every angle is identical. If your angles vary by even half a degree, by the time you’re ten courses up, your ‘soldier course’ is going to look like a spiral staircase.
The Chemistry of the Mud: Suction and Hydration
Once you have your clean cuts, the way you lay them matters as much as the geometry. I see too many ‘handymen’ slap dry bricks onto wet mortar. The brick has something called an Initial Rate of Absorption (IRA). If that brick is too dry, it sucks the water right out of the mud—I call it ‘sucking the life’ out of the joint. This leads to a ‘flash set’ where the mortar dries but never actually cures. It turns to powder. When doing spalled concrete steps repair or custom brickwork, I always check the ‘suction’ of the brick. If it’s a high-suction brick, you have to pre-wet it. You want the mortar to hydrate slowly, forming those long, crystalline chains that lock the brick in place. For historic restoration, this is why we avoid modern Portland cement. It’s too hard. It doesn’t breathe. We use lime-based mortars that allow moisture to move through the joint rather than being trapped behind a hard shell, which is the primary cause of face-spalling.
Advanced Inspections: From Drones to Smoke Stacks
In my forensic work, I’ve started utilizing drone chimney inspections to see what the human eye misses from the ground. When a custom column or a chimney is failing, it usually starts at the top. If the stone coping installation wasn’t done with a proper drip edge, water runs down the face of the brick and finds those tiny micro-fractures from poor cuts. On larger industrial jobs, like commercial smokestack repair, we see the same physics on a massive scale. The heat from the stack causes the interior to expand faster than the exterior. If the masonry isn’t flexible—meaning the mortar is softer than the brick—the stack will literally tear itself apart. This is why chimney heat shield installation and chimney flashing repair are so vital; they manage the thermal and moisture gradients that otherwise destroy even the best brickwork.
“The mortar should always be weaker than the masonry units so that it acts as a sacrificial element, accommodating movement and moisture.” – ASTM C270 Standards
The ‘Slicker’ Finish: Tuckpointing and Aesthetics
After the column is built with those clean, angled cuts, the finishing touch is the joint. Some people like a raked joint, but if you want longevity, you want a ‘concave’ or ‘V’ joint. You take your ‘slicker’ (the jointer tool) and you pack that mud tight into the kerf of the cut. This compaction increases the water-shedding capability of the joint. If you’re dealing with an old wall where the joints have eroded, you might need tuckpointing machine services to get deep enough to create a new bond. But beware of the ‘lick-and-stick’ mentality. Real tuckpointing is an art form—it involves cutting out the old mortar to a depth of at least 3/4 inch and ‘buttering’ in new mud in layers. It’s the only way to prevent the kind of ‘honeycombing’ that leads to structural failure. Whether it’s a simple chimney flashing repair or a complex column, the rules of physics don’t change: respect the water, manage the heat, and never trust a dry cut.
Conclusion: Do It Once, or Do It Twice
Masonry is a game of patience and precision. You can try to save time by dry-cutting your angles with a hand grinder, but you’ll pay for it in the end when the edges chip and the joints fail. A clean cut on a custom column isn’t just about looking good for the homeowner’s Instagram; it’s about creating a surface that can bond, breathe, and endure. From the foundation to the stone coping installation on the roof, every piece of the puzzle must fit with mathematical certainty. If you see a contractor showing up without a wet saw for custom angle work, send him packing. Your house—and your wallet—will thank you later.