
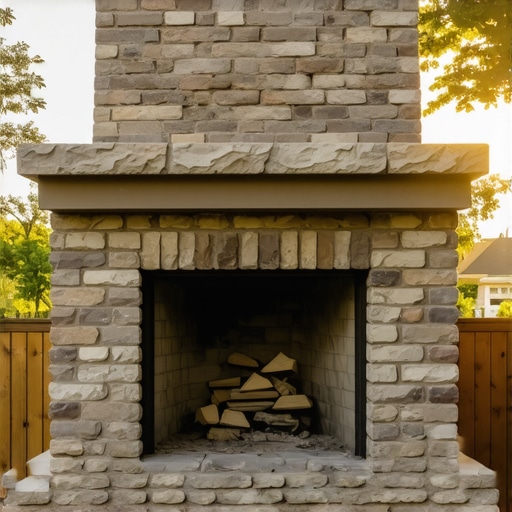
The Anatomy of a Dying Hearth
I’ve spent forty years listening to the language of stone, and most of what I hear lately is a scream for help. When someone calls me to discuss upgrading an old outdoor fireplace with a new stone mantle, they usually think they’re talking about aesthetics. They’re thinking about the visual weight of a piece of split-face granite or a slab of reclaimed limestone. But when I look at a chimney that’s been baking in the sun and soaking in the rain since the Eisenhower administration, I don’t see a canvas. I see a thermodynamic engine that is slowly vibrated apart by thermal shock and hydrostatic pressure. Before you even think about masonry repair services, you have to understand the chemistry of what’s holding that stack together.
My old man used to say that if the firebox doesn’t breathe, the stone will eventually scream. He had this ritual: he’d take a spray bottle of water and mist the old brickwork before he ever let a hawk-full of mud touch the surface. If the water beaded, he’d walk away. If it vanished instantly, the brick was ‘thirsty’ and would suck the life out of the mortar before it could even begin the hydration process. ‘You’re not just gluing a rock to a wall,’ he’d growl, ‘you’re performing a skin graft.’ If that bond doesn’t have the right ‘tooth,’ that $2,000 mantle is nothing more than a heavy guillotine waiting for the first hard freeze.
“Water penetration is the single greatest threat to masonry durability. Moisture entering the masonry system can cause efflorescence, freeze-thaw damage, and corrosion of embedded metals.” – BIA Technical Note 7
The physics of an outdoor fireplace are brutal. Unlike an indoor hearth, which stays relatively stable in temperature and humidity, an outdoor chimney is an island of masonry in a sea of elements. In the northern climates, we deal with the 9% expansion of water. When you have a brick arch restoration project or a mantle upgrade, you are dealing with moisture that is perpetually trying to get behind your stone veneer. If you use a modern, high-strength Portland cement on a chimney built with soft, 1920s-era lime mortar, you’ve just signed its death warrant. The new ‘mud’ will be harder than the old brick. When the temperature drops and the structure moves, the hard mortar won’t give. Instead, it will shear the face right off the brick. This is why mortar repointing services must always prioritize the sacrificial principle: the mortar must always be softer than the unit it holds.
The Geotechnical Reality of the Base
Before we even talk about re-pointing services or modular masonry construction, we have to look down. An outdoor fireplace is a massive concentration of weight on a very small footprint. I’ve seen brick patio restoration jobs where the homeowner wanted a 500-pound limestone mantle added to a chimney that was already sinking. The addition of that mass, coupled with the lack of proper retaining wall weep hole cleaning in the surrounding hardscape, creates a localized pressure cooker. If the soil hasn’t been compacted to 95% Proctor density, your new mantle will be the catalyst for a structural pivot. You’ll see it first as a hairline crack—not in the mantle itself, but in the soldier course three feet away. That’s the chimney telling you it’s tired of carrying the load.
When we get into the forensics of a failing mantle, we often find a ‘cold joint.’ This happens when the mason doesn’t properly ‘butter’ the back of the stone or fails to achieve a mechanical bond with the substrate. You can’t just slap some thin-set on an old soot-covered chimney and expect it to hold. You have to grind out the old joints—we’re talking a minimum of 3/4 inch deep—to provide a keyway for the new material. This is where masonry joint sand repair and proper chimney repair services converge. We aren’t just filling gaps; we are restoring the structural continuity of the masonry mass. Every joint you rake out is an opportunity to re-establish the capillary break that keeps water from migrating into the core of the stack.
“The selection of mortar for masonry restoration should be based on the physical properties of the masonry units. A mortar that is too strong can cause the masonry units to crack or spall.” – ASTM C270 Standards
The Science of the Mantle Bond
Modern AI masonry assessment tools are fine for a bird’s-eye view, but they don’t feel the ‘suction.’ When I’m prepping for a mantle install, I’m looking at the pore structure of the stone. Sandstone is a sponge; granite is a shield. If I’m hanging a sandstone mantle, I have to be incredibly careful about the ‘slicker’—the tool I use to finish the joints. If I over-work the joint, I bring too much ‘cream’ to the surface, sealing the pores and trapping moisture behind a thin skin of cement. This leads to ‘honeycombing,’ where the interior of the mortar remains soft and crumbly while the outside looks like glass. Eventually, the whole thing just lets go.
Then there’s the issue of thermal expansion. A stone mantle sitting directly above a firebox is going to reach temperatures of 150 to 200 degrees Fahrenheit, while the backside of the chimney might be at 40 degrees. This creates a massive thermal gradient. If you don’t use a flexible, lime-heavy ‘mud,’ the mantle will expand at a different rate than the brick behind it. You need that ‘give.’ You need a mortar that acts as a gasket, not a weld. This is why re-pointing services for high-heat areas are a specialty within a specialty. You aren’t just a mason; you’re an engineer of expansion. You have to account for every millimeter of movement, or the very first fire of the season will result in a sickening ‘pop’—the sound of your investment cracking in half.
The Restoration Process
If you’re serious about upgrading an old outdoor fireplace with a new stone mantle, the process starts with a thorough cleaning. I’m not talking about a garden hose. I’m talking about removing decades of carbon, soot, and atmospheric pollutants that have clogged the ‘tooth’ of the brick. Once the substrate is clean, we look for ‘blown’ bricks. These are units where the internal pressure of freezing water has already caused the structural core to fail. These must be replaced before the mantle goes on. This is the stage where masonry repair services become essential. You cannot build a new future on a crumbling past.
Next, we address the ‘suction’ I mentioned earlier. We pre-hydrate the wall, then apply a ‘scratch coat’ of Type N or Type O mortar. This isn’t the finished product; this is the anchor. While that’s still ‘green,’ we score it to create a mechanical key. Only then do we ‘butter’ the back of the stone mantle. We want 100% coverage. No voids. Voids are where water collects. Voids are where the ‘freeze’ finds a home. When we set that stone, we aren’t just placing it; we are ‘beating it in’ with a rubber mallet until the mud squeezes out of every side. That ‘squeeze’ tells me there are no air pockets. That’s the sound of a job that will last a hundred years. Finally, we finish the joints with a jointing tool—a ‘slicker’—to compress the surface of the mortar and create a weather-tight seal. This is the difference between a ‘handyman special’ and master craftsmanship. One looks good for a season; the other survives the century.