
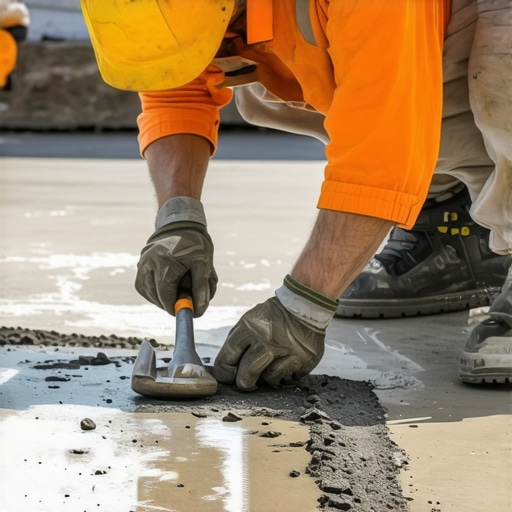
The Sound of Failure: A Master Mason’s Ear for Concrete
I remember my father dragging a heavy logging chain across a driveway back in the winter of ‘78. He wasn’t looking at the ground; he was listening. Most people see a patch of scaling concrete and think it’s a cosmetic blemish. My old man knew better. He was listening for that hollow, drum-like thud—the sound of delamination. He taught me that if a slab doesn’t ‘sing’ with a high-pitched ring when struck, the bond is already dead. You can slap the best polymer-modified mud in the world over that surface, but you’re just burying a corpse. In the world of concrete flatwork services, the difference between a repair that lasts thirty years and one that fails in three months comes down to the forensic preparation of the substrate. Most ‘handyman’ fixes are just lick-and-stick jobs that ignore the brutal physics of the freeze-thaw cycle.
“Water penetration is the single greatest threat to masonry durability, leading to the internal expansion that manifests as surface spalling.” – BIA Technical Note 7
The Physics of the Pop: Why Concrete Spalls
To fix concrete, you have to understand why it’s trying to shed its skin. In northern climates, we deal with a 9% volume expansion every time water freezes inside the capillary pores of the concrete. If the concrete wasn’t air-entrained—meaning it lacks billions of microscopic ‘cushion’ bubbles—that internal hydraulic pressure has nowhere to go. It pops the face of the concrete right off. This is why emergency masonry repair often becomes necessary after a particularly wet autumn followed by a deep freeze. But it’s not just the ice. We’re also fighting carbonation. Over decades, CO2 penetrates the concrete, lowering the pH level and causing the embedded rebar to rust. That rust expands to four times its original volume, creating an internal wedge that forces the concrete apart. If you see a rust stain bleeding through your stone coping installation or your patio, the cancer is already deep in the bones.
The Critical Step: Achieving the CSP (Concrete Surface Profile)
Preparation isn’t just about a quick pass with a pressure washer. I’ve seen guys try to resurface a slab that still had oil spots and tire marks, then wonder why their overlay peeled off like a sunburn. For a durable bond, you need mechanical profiling. We talk about the CSP, or Concrete Surface Profile, rated from 1 to 9. For a thin-set resurfacing layer, I don’t settle for anything less than a CSP 3 or 4—which feels like 60-grit sandpaper. This provides the ‘tooth’ the new mud needs to bite into. If the surface is too smooth, the new layer is just floating. Using a diamond grinder or a shot-blaster is the only way to get through the laitance—that weak, milky layer of cement paste that rises to the top during the original pour. If you’re dealing with crumbling mortar joint repair at the edge of the slab where it meets a brick wall, you need to grind those joints back at least an inch to ensure the new material has enough mass to resist shrinkage.
The Chemistry of the Bond: SSD and Polymer Magic
One of the biggest mistakes I see is contractors pouring new mix onto a bone-dry slab. That dry concrete is thirsty; it will suck the moisture right out of your new mix before the cement crystals have a chance to grow into the pores. This results in a ‘flash set’ and a guaranteed bond failure. You must achieve a ‘Saturate Surface Dry’ (SSD) condition. The concrete should be damp, but with no standing water. This is where we talk about the hydration process. When you mix a concrete pump masonry mixes or a high-strength resurfacer, the tricalcium silicate (C3S) starts forming long, needle-like crystals. In an SSD environment, those crystals grow deep into the old concrete, interlocking like microscopic Velcro. I often prefer a polymer-modified overlay for this. The polymers act as an internal glue, providing the tensile strength that standard Portland cement lacks. This is particularly vital for outdoor masonry fountain restoration, where the material is constantly fighting hydrostatic pressure and chemical saturation.
“The bond strength of a repair material must exceed the tensile strength of the substrate to ensure structural integrity.” – ASTM C1583 Standards
Integrating Structural Integrity: From Foundation to Finish
You can’t treat a slab in isolation. If the ground underneath is shifting, your new surface will crack before the month is out. This is where foundation waterproofing and proper drainage come into play. If water is pooling under the slab, the capillary rise will push salts (efflorescence) to the surface, blowing the bond from the bottom up. When I’m called for structural repointing on a chimney or a retaining wall, I’m looking at the whole system. Is there a modular masonry construction element that’s trapping moisture? Are the tile grouts on masonry surfaces cracked and allowing seepage? A master doesn’t just fix the hole; he fixes the reason the hole appeared. For example, if you’re resurfacing a walkway, you need to honor the existing expansion joints. If you ‘bridge’ a joint with your resurfacer, the concrete will simply create its own joint—usually a jagged, ugly crack—exactly where the old one was. Every relief joint must be meticulously carried through to the new surface.
Final Execution: The Butter and the Slicker
When it’s time to lay the mud, I don’t just dump it out. I ‘butter’ the surface with a thin slurry coat first, scrubbing it into the pores with a stiff-bristled broom. This ensures every microscopic nook is filled. Then, we come over the top with the main lift. Whether you’re using a hawk and trowel or a slicker to finish the edge, timing is everything. If you work the cream too much, you’ll weaken the surface and end up with ‘dusting’ later on. It’s about knowing the ‘feel’ of the mix—when it’s lost its sheen but is still plastic enough to take a broom finish. This isn’t a job for the ‘handyman special’ crowd. It requires a forensic understanding of the material’s life cycle. Do it once, do it right, or don’t do it at all. Because in this business, your reputation is only as solid as the bond you create.{“@context”:”https://schema.org”,”@type”:”HowTo”,”name”:”How to Prepare Spalled Concrete for Resurfacing”,”step”:[{“@type”:”HowToStep”,”text”:”Sound the concrete with a hammer or chain to identify delaminated areas.”},{“@type”:”HowToStep”,”text”:”Mechanically remove all loose and weak concrete using a diamond grinder or hammer drill to reach sound aggregate.”},{“@type”:”HowToStep”,”text”:”Clean the surface of all oils, dust, and laitance to achieve a CSP 3-4 profile.”},{“@type”:”HowToStep”,”text”:”Bring the substrate to a Saturate Surface Dry (SSD) condition by pre-wetting with water.”},{“@type”:”HowToStep”,”text”:”Scrub a slurry coat of the repair mortar into the pores before applying the full resurfacing layer.”}]}