
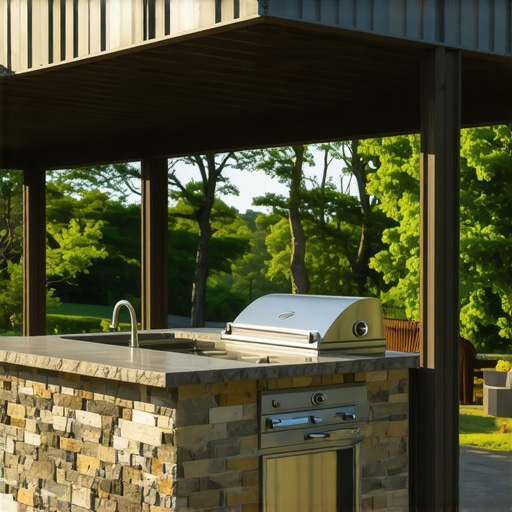
The Forensic Reality of the Outdoor Kitchen
The homeowner thought it was just a hairline crack. A thin, jagged line running through the stone veneer of their $60,000 outdoor kitchen. But when I put my scope inside through a weep hole, I saw the structural steel was rusted to dust and the CMU blocks were shearing away from the slab. This is the reality of masonry in a climate where the ground breathes. People see a finished patio and think it is permanent. It is not. Masonry is a slow-motion battle against physics, chemistry, and the weight of the world. If you do not respect the ground you build on, the ground will reclaim your work in less than five winters. As a third-generation mason, I have seen too many people spend a fortune on high-end appliances only to set them on a base that has the structural integrity of wet cardboard. We are going to talk about why your outdoor kitchen is likely to fail and how to build one that will outlive your mortgage.
The Physics of the Subgrade and the Freeze-Thaw War
In the North, we live and die by the freeze-thaw cycle. Water expands approximately 9% when it turns to ice. That is an irresistible force. If that expansion happens inside your mortar joints or, worse, beneath your footing, something is going to break. Most ‘handyman specials’ fail because the contractor did not understand hydrostatic pressure. When the soil saturates, it pushes against the buried masonry. If you have not accounted for drainage, that pressure will pop the face off your brickwork or buckle your walls. This is where freeze-thaw damage restoration begins—by fixing the drainage before you even touch a trowel. You need a compacted aggregate base that allows water to move away from the structure, not sit beneath it like a reservoir. I am talking about 8 to 12 inches of crushed stone, compacted in lifts, to ensure there is no ‘memory’ in the soil that leads to settling later.
“Water penetration is the single greatest threat to masonry durability. Without proper flashing and drainage, even the best materials will eventually succumb to the cycles of nature.” – BIA Technical Note 7
The Chemistry of the Mud: Why Mortar Matters
I see guys using high-strength Type S mortar for everything because they think ‘stronger is better.’ They are wrong. In the world of historic pointing styles and long-term durability, you have to match the mortar to the masonry unit. If you are using a reclaimed brick for that ‘old world’ look, you cannot use a hard Portland-based mortar. The mortar must be the sacrificial element. It needs to be softer than the brick so that when the wall moves—and it will move—the mortar takes the stress, not the brick face. This is why we use sustainable tuckpointing mortars based on lime. Lime mortar has a ‘self-healing’ property; as it carbonates over decades, small micro-cracks can actually seal themselves. When I am buttering a brick, I am looking for that perfect ‘tooth’—the way the mortar grabs the surface and holds on. If the brick is too dry, it sucks the moisture out of the mud too fast, leading to a ‘flash set’ that never reaches full crystalline strength. We call that ‘burning’ the joint, and it is the hallmark of a hack job.
Structural Components: From Chimney Crowns to Coping
If your outdoor kitchen includes a wood-fired oven or a masonry fireplace, you are dealing with extreme thermal gradients. I have seen chimney crown repair jobs where the concrete was poured directly against the flue with no bond break. When that flue gets hot, it expands. If it has nowhere to go, it cracks the crown wide open. You need a proper wash and a drip edge. Furthermore, chimney heat shield installation inside the firebox is not optional; it is the difference between a cozy evening and a structural failure. Then there is the stone coping installation. The coping is the ‘hat’ of your wall. If the hat leaks, the body rots. I use masonry birdsmouth cuts on corner returns to ensure a tight, mechanical fit that sheds water effectively. Every joint should be struck with a slicker or a jointer tool to compress the mortar and create a convex profile that refuses to let water sit. This is the difference between various brickwork pointing styles; a weathered joint or a V-joint is not just an aesthetic choice; it is a hydrological strategy.
“The mortar shall be specified by the proportion of its constituents and its ability to accommodate the movement of the masonry units without causing distress to the assembly.” – ASTM C270 Standard Specification
The Art of the Finish: Restoring the Soul of Masonry
Sometimes I am called in for outdoor masonry fountain restoration or to fix a crumbling chimney cap replacement. The process is always the same: forensic analysis of the failure. Most of the time, it is because someone used a ‘lick-and-stick’ veneer with no air gap. Real masonry breathes. When you are doing brickwork pointing styles for a client who wants that timeless look, you have to be meticulous about the ‘strike.’ You wait until the mud is ‘thumb-print hard,’ then you run the slicker over it to seal the pores. If you do it too early, you get a smear. If you do it too late, you get no seal. It is a tactile experience that no machine can replicate. You feel the grit of the sand and the creaminess of the lime. That is the soul of the trade. When we finish a soldier course or a complex arch, it should look like it grew out of the ground, not like it was pasted onto it.
How to Build a Non-Shifting Outdoor Foundation
1. Excavate to a depth of 12 inches below the local frost line to ensure the subgrade is stable. 2. Install a non-woven geotextile fabric to prevent soil migration into your aggregate base. 3. Backfill with 3/4-inch crushed limestone in 3-inch lifts, using a plate compactor until the base is ‘ringing’ hard. 4. Level the base with a thin layer of stone dust or bedding sand, ensuring a 1/8-inch slope per foot for drainage. 5. Lay your first course of CMU (Concrete Masonry Unit) blocks on a thickened-edge slab, reinforcing with #4 rebar every 16 inches. 6. Apply a waterproof parge coat to the exterior of the buried blocks to prevent moisture wicking. 7. Install your stone or brick veneer using a soft lime-based mortar to allow for thermal expansion.
The bottom line is simple: do it once or do it twice. If you skimp on the compaction or use the wrong mud for your sustainable tuckpointing mortars, you will be calling someone like me in five years to perform freeze-thaw damage restoration on a pile of expensive rubble. Masonry is about the long game. It is about understanding that while the sun might feel good on your back today, the ice is coming for your joints tonight. Build for the ice, and the sun will take care of itself.
” ,”image”:{“imagePrompt”:”A close-up, high-detail photo of a master mason’s weathered hands using a steel slicker to strike a mortar joint on a brick outdoor kitchen wall. The mortar has a gritty texture, and the bricks are a deep, multi-tonal red. In the background, a stone coping installation is visible with a perfectly executed birdsmouth cut on the corner. The lighting is late afternoon sun, highlighting the ‘tooth’ of the stone and the professional craftsmanship of the masonry.”,”imageTitle”:”Master Mason Striking a Joint”,”imageAlt”:”A professional mason performs high-quality tuckpointing on an outdoor kitchen wall using traditional tools.”},”categoryId”:12,”postTime”:”2023-10-27T10:00:00Z”}