
The Tragedy of the Suffocated Facade
I recently walked a job site where a developer had bought a load of salvaged 1920s Chicago commons, intending to use them for a feature wall. They were beautiful, or at least they would have been if some ‘handyman’ hadn’t coated them in three layers of lead-based oil paint back in the seventies. The developer thought he could just blast it off with a high-pressure washer. By the time I arrived, he hadn’t just removed the paint; he had obliterated the ‘fire-skin’—that hard, vitrified outer layer of the brick formed during the kiln firing. What was left was a porous, crumbling mess that looked more like sponge cake than structural masonry. When you strip a salvaged brick incorrectly, you aren’t just cleaning it; you are performing a slow-motion execution of the material’s structural integrity. To understand why, we have to look at the ‘tooth’ of the brick and the chemistry of the bond.
The Physics of the Fire-Skin and Vapor Permeability
A brick is not a solid, inert block. It is a breathing, capillary-rich organism. During the firing process, the minerals on the surface of the clay melt and fuse into a protective shell. This skin is the brick’s only defense against the relentless freeze-thaw cycles of the north. When paint is applied, it clogs these pores. If that paint is a modern latex or a heavy oil, it traps moisture behind the surface. In a cold climate, that trapped water expands by 9% when it turns to ice. Because the paint acts as a vapor barrier, the water cannot escape. The resulting internal pressure eventually pops the face of the brick right off—a process we call spalling.
“Water penetration is the single greatest threat to masonry durability, and the use of impermeable coatings like paint often exacerbates this by trapping moisture within the wall assembly.” – BIA Technical Note 7
This is why removing paint from salvaged units is more than an aesthetic choice; it’s a prerequisite for historic mortar analysis and long-term survival.
Option B: The Old Master’s Test
My first mentor, a man who had more lime in his lungs than the ASTM standards require, used to carry a small ball-peen hammer just for salvaged brick. He’d pick up a painted unit and give it a sharp tap. If it ‘sang’ with a high-pitched ring, the internal structure was still sound despite the paint. If it gave a dull ‘thud,’ he’d toss it in the rubble pile. He knew that the paint often hides a rotted core where moisture has already begun the process of internal delamination. Before you even think about masonry cleaning, you need to know if the brick is worth the effort of saving. If the suction—the initial rate of absorption—has been compromised by chemical ingress, no amount of professional masonry restoration will make that brick take a ‘mud’ bond again.
Chemical Stripping: The Surgical Approach
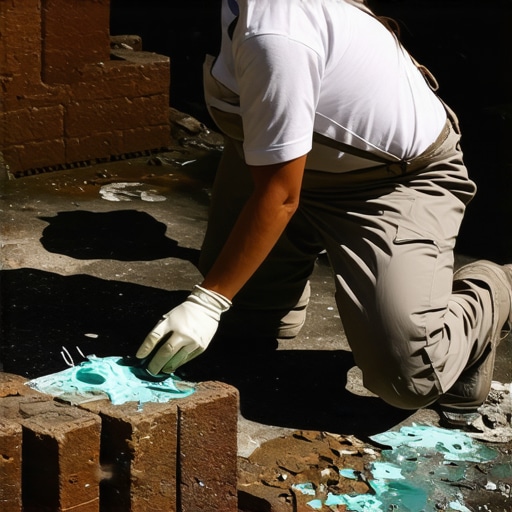
The only way to strip a historic brick without destroying it is through chemical dissolution. We don’t use sand; we use chemistry. Most salvaged bricks require a paste-based alkaline stripper or a solvent-based ‘peel-away’ system. You apply the ‘mud’—the stripping agent—thickly, like you’re ‘buttering’ a joint, then cover it with a fibrous paper to keep it from ‘flash setting’ or drying out too quickly. This allows the chemicals to migrate into the ‘tooth’ of the brick, softening the paint’s molecular bond from the inside out. Once the dwell time is reached—sometimes 24 hours depending on the ambient temperature—you peel the paper back, and the paint should come with it. This prevents the need for high-pressure water, which is the enemy of chimney structural repair and facade work alike. If you use more than 500 PSI on a salvaged brick, you’re doing it wrong.
The Role of Historic Mortar Analysis
Once the bricks are clean, you can’t just throw them back together with a bag of Type S cement from a big-box store. Those old bricks are soft. If you use a modern, high-strength Portland cement mortar, you are creating a ‘hard’ joint against a ‘soft’ unit. When the wall expands in the sun, the mortar won’t give, so the brick will crush itself. This is where historic mortar analysis becomes critical. We look for a ‘sacrificial’ mortar—usually a lime-rich Type O or a custom mix—that is softer than the brick itself.
“Mortar should always be weaker than the masonry units so that it acts as a sacrificial element, allowing for thermal movement without damaging the masonry units.” – ASTM C270 Standards
When we perform tuckpointing brick walls or flush pointing services, we are ensuring that the mortar is the part that fails over fifty years, not the irreplaceable salvaged brick.
The Mechanics of Restoration: Beyond the Surface
Sometimes, the damage goes deeper than just paint. If those salvaged bricks are being used in a chimney repair services context, you have to worry about the flue gases and acidic condensate that have leached into the clay over the decades. This is why freeze-thaw damage restoration often involves more than just a surface scrub. We might need to look at foundation helical pier installation if the weight of a restored masonry chimney is too much for the existing soil to handle, especially if the original foundation was a simple ‘rubble trench’ common in historic builds. A master mason doesn’t just look at the brick; he looks at the entire structural load path. From the professional masonry restoration of the crown to the ‘soldier course’ at the base, every element must work in harmony with the physics of the site.
Conclusion: The Cost of Craftsmanship
Don’t let a ‘lick-and-stick’ contractor tell you that a quick acid wash will fix painted salvaged bricks. They’ll leave you with a wall that ‘honeycombs’ and crumbles within five winters. True masonry repair services require patience and a deep understanding of the material’s history. You strip gently, you analyze the mortar, and you ‘slick’ your joints with a precision that honors the original mason. Do it right once, and that brick will last another century. Do it cheap, and you’ll be looking at a pile of red dust before the mortgage is paid off. Always remember: the ‘mud’ you use is the glue of history, and you don’t treat history with a power washer.