
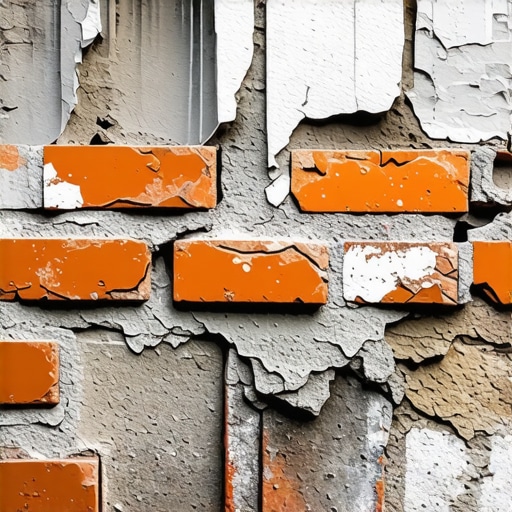
The Forensic Scene: The Dust That Lies
The homeowner called me out because she thought her house was just ‘shedding a little dust’ near the foundation. She’d spent three grand on a handyman who smeared a layer of grey Portland cement over the red clay bricks to ‘seal it up.’ But when I pulled my digital scope out and fed it through a hairline fissure in the mortar, I didn’t see solid masonry. I saw a void. The structural steel lintel above the window was a jagged landscape of oxidized flakes, rusted down to a ghost of its former self, and the back of the brick face was literally exploding in slow motion. The ‘dust’ wasn’t dirt; it was the lifeblood of the building turning into powder. This is the reality of masonry forensics: by the time you see the flakes on the sidewalk, the war is already halfway over.
The Physics of the Face-Pop: Why Bricks Fail
Spalling isn’t just a cosmetic blemish; it’s a mechanical failure of the masonry unit’s face. To understand it, you have to look at the pore structure of the clay. When a brick is fired in a kiln, it develops a hard, vitrified outer skin. This skin is the building’s first line of defense against the elements. However, bricks are essentially sponges with a very low thirst. They have capillaries that pull moisture in through suction. If that moisture gets trapped—either by a non-breathable sealant or a mortar that’s too hard—it has nowhere to go. When the temperature drops and that internal water hits the freezing point, it undergoes a phase transition, expanding by 9% in volume. This isn’t a gentle nudge; it’s a hydraulic press working from the inside out. This internal pressure eventually exceeds the tensile strength of the clay, and the face of the brick simply shears off. We call this ‘shaling’ or ‘spalling.’ It’s the terminal stage of a moisture problem that likely started a decade ago.
“Water penetration is the single greatest threat to masonry durability. Moisture trapped within the masonry wall can lead to efflorescence, sub-florescence, and eventually, the destructive process of spalling.” – BIA Technical Note 7
The Early Warning Signs: Hairlines and Hollows
You don’t need a degree in structural engineering to spot the early stages, but you do need to stop looking at the wall and start feeling it. The first sign is often a subtle change in the texture of the brick. If you run your hand across a soldier course and feel a slight ‘grittiness’ that doesn’t wash away, you’re looking at the breakdown of the vitrified surface. Next, look for ‘map cracking’—tiny, spider-web-like fissures that don’t follow the mortar joints but cut right through the brick itself. This is often the result of brick veneer detachment, where the brick is pulling away from the backup wall, creating a pocket for water to collect. I always carry a small slicker or a mason’s hammer. I’ll walk a wall and lightly tap the bricks. A healthy brick ‘rings.’ A spalling brick ‘thuds.’ That thud tells me there is a delamination occurring behind the surface. The face is already detached; it’s just waiting for the next freeze to fall off.
The Role of Historic Mortar Analysis
If you’re dealing with a building constructed before 1940, the biggest enemy isn’t the weather; it’s the mud. Modern masons love Type S mortar because it sets fast and they can butter their bricks and move on. But historic bricks are soft. They were fired at lower temperatures and have a high permeability. If you use a high-strength Portland cement for historic tuckpointing, you’ve created a trap. The mortar is now harder and less permeable than the brick. Moisture will always take the path of least resistance. Instead of evaporating through the mortar joints (which are supposed to be the ‘sacrificial’ part of the wall), the moisture is forced into the brick. The brick then bears the full brunt of the freeze-thaw cycle. This is why historic mortar analysis is the first step in any masonry rescue after disaster. We need to match the compressive strength and the vapor permeability of the original lime-based mortar to ensure the wall can breathe again.
“The properties of the mortar should be compatible with the units being used. Using a mortar that is significantly stronger than the masonry unit can lead to accelerated weathering and spalling of the unit faces.” – BIA Technical Note 1
Identifying Failure in Arches and Quoins
The most dangerous places for spalling are the structural focal points. Brick arch restoration is a delicate surgery. When the bricks in an arch start to spall, the structural integrity of the opening is compromised. The ‘key’ brick at the top of the arch is under immense compressive force; if its face pops, the weight distribution shifts, often leading to a cold joint opening up or a total collapse. Similarly, brick quoin repair—those decorative or structural corners of a building—is critical because corners are exposed to wind and rain from two sides. If the quoins start to shale, you’re losing the ‘teeth’ that hold the two planes of the building together. I’ve seen brick lintel replacement jobs where the contractor ignored the spalling in the surrounding quoins, only to have the whole corner fail three years later because the underlying moisture issue wasn’t addressed.
Modern Tools: Drone Chimney Inspections
Sometimes the spalling starts where you can’t see it. The chimney is the most exposed part of any structure. It takes the wind, the rain, and the thermal shock of the flue gases. By the time you see bricks falling onto your lawn, the chimney crown has likely been cracked for years. This is where drone chimney inspections have changed the game. I can fly a 4K camera six inches away from the soldier course at the top of a three-story stack and see the minute shaling that indicates the flue liner has failed. If we catch it early, we can perform historic brick salvage—saving the original units that are still sound and only replacing the ‘rotten’ ones before the whole stack becomes a liability.
The Solution: Do It Once, Do It Right
Fixing spalling isn’t about slapping some concrete flatwork services patch over the hole. It’s a forensic process. First, you have to stop the water. This might mean brick lintel replacement to fix a rusted iron bar that’s heaving the masonry, or it might mean a full historic tuckpointing job using a soft, breathable lime putty. If the brick is too far gone, we look for historic brick salvage to find a match that has the same ‘tooth’ and color as the original. We don’t use ‘lick-and-stick’ solutions. We grind out the joints to a depth of at least 1 inch, wash the dust out to ensure a good bond, and then ‘point’ the new mud in layers. It’s slow, it’s expensive, and it’s the only way to ensure the building stands for another century. Don’t listen to the guy who says he can seal your bricks with a clear spray. That’s just a plastic bag that will accelerate the rot. You want a wall that breathes, not a wall that’s suffocating.