
The Tragic Anatomy of a Ruined Facade
I recently walked past a 1920s brick manor where the owner had spent a fortune on what they thought was a ‘protective’ glossy coating. Three years later, the building looked like it had a skin disease. Huge flakes of red clay were popping off the wall, littering the sidewalk in a red dust. That is the tragedy of a ruined historic facade. The homeowner had essentially shrink-wrapped a breathing organism, and the moisture, trapped behind a plastic-like film, did exactly what physics dictated: it expanded during the first frost and blew the face right off the brick. This is spalling in its most violent form, and it is entirely preventable if you understand the molecular dance between water and clay.
My mentor, a man who had more mortar under his fingernails than most people have in their foundations, used to perform a simple test on every batch of reclaimed brick. He’d submerge a specimen in a bucket and listen. He called it ‘the brick’s breath.’ If the brick didn’t hiss and bubble with a certain rhythm, he knew the pore structure was clogged or the firing was off. He’d throw it in the scrap pile immediately. Here is why that matters today: your masonry is a series of interconnected capillaries. If you block those capillaries with the wrong sealer, you aren’t protecting the building; you’re signing its death warrant. To stop spalling, you have to work with the physics of vapor transmission, not against it.
“Water penetration is the single greatest threat to masonry durability, and its control is essential to the long-term performance of the wall system.” – BIA Technical Note 7
The Micro-Physics of Spalling and the 9% Rule
To perform a proper masonry damage assessment, we have to look at the chemistry of the freeze-thaw cycle. When water enters a porous brick and the temperature drops below 32 degrees Fahrenheit, that water undergoes a phase change. It expands by approximately 9% in volume. In a dense material like brick or concrete, there is nowhere for that extra volume to go. The resulting internal pressure can exceed the tensile strength of the masonry unit, causing the surface to fracture and shear off. This is the ‘spall.’ In commercial tuckpointing projects, we see this most often on parapet walls and chimneys where the exposure to the elements is 360 degrees.
Using a Silane-Siloxane sealer is the only professional-grade solution because of its molecular size. Silanes are tiny molecules that can penetrate deep into the substrate, bonding chemically with the silica in the brick. Siloxanes are slightly larger and sit closer to the surface. Together, they create a hydrophobic barrier that repels liquid water while remaining ‘breathable’ to water vapor. This means the 9% expansion doesn’t happen because the liquid never gets in, but any moisture coming from the interior of the building can still escape as a gas. Without this breathability, you are just building a pressure cooker.
The Restoration Reality: Why ‘Mud’ Matters
Before you even think about reaching for a sprayer, you have to address the joints. Historic tuckpointing isn’t just about aesthetics; it’s about structural integrity and moisture management. If your mortar is cracked or falling out, a sealer is just a Band-Aid on a bullet wound. When we tackle tuckpointing curved walls, the geometry is even more demanding. The joints on the outer radius are wider than those on the inner, requiring a master’s touch to ensure the ‘mud’ (mortar) is packed tightly without voids. We often use fiber-reinforced mortars for specific foundation crack repair scenarios where extra lateral strength is required, but for old brick, the rule is simple: the mortar must be softer than the brick.
“Mortar should be selected based on the properties of the masonry units. A mortar that is too hard can cause the masonry units to crack or spall during thermal expansion.” – ASTM C270 Standards
When mortar repointing services are performed correctly, we use a ‘slicker’ to strike the joint, compressing the mud and creating a ‘weather-struck’ profile that sheds water. If you leave the joints ‘sandy’ or ‘open,’ they act like a sponge. Once the repointing is cured—and I mean fully cured, usually 28 days—then and only then do we apply the Silane-Siloxane. This is the difference between a ‘handyman special’ and a forensic restoration. We are now even using digital twin masonry projects to map out moisture migration in high-value historic buildings before we even mix a bag of Type N mortar.
Step-by-Step Restoration and Sealing Process
If you are looking at spalled concrete steps repair or a full chimney rebuild, the process follows a strict hierarchy of operations. You cannot skip steps. You start with a thorough cleaning to remove any biological growth or efflorescence (that white salty crust). Do not use a high-pressure washer; you’ll blow out the soft interior of the brick. Use a low-pressure wash and a stiff brush.
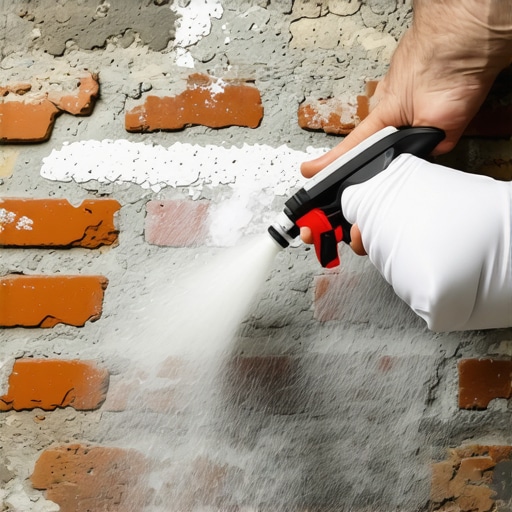
Once the substrate is clean and dry, you inspect the joints. Tuck pointing services involve grinding out the old, failing mortar to a depth of at least twice the width of the joint. You ‘butter’ the joints with fresh, lime-rich mud, ensuring no ‘cold joints’ where new mortar meets old without a bond. After the wall has cured and the pH has stabilized, you apply the Silane-Siloxane sealer using a low-pressure sprayer, starting from the bottom and working up, allowing a ‘run-down’ of about 6 to 8 inches. This ensures maximum penetration into the ‘tooth’ of the stone or brick.