
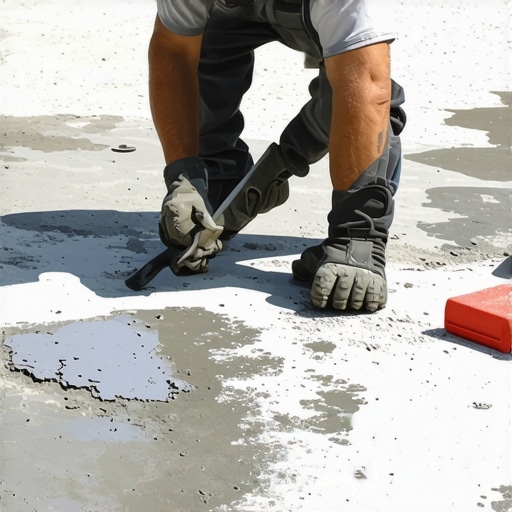
The Thud of Failure: A Forensic Look at Delamination
You hear it before you see it. That ‘thud’—the dull, hollow sound when a masonry hammer strikes what should be a solid, monolithic surface. As a third-generation mason, I’ve spent my life listening to the language of stone and lime. When a patch detaches from old concrete, it’s not just an eyesore; it’s a symptom of a fundamental breakdown in material physics. I recently stood in a damp 1920s cellar where the homeowner pointed to a ‘hairline crack’ in a structural pier. I didn’t even need my scope. I gave the wall a light rap with the butt of my trowel, and a five-pound slab of previous repair work fell at my boots like a piece of dead bark. Behind it, the original aggregate was damp, crumbling, and suffocated. This is the ‘Ghost Patch’—a repair that looks fine on the surface while the Cold Joint behind it is actively rotting the structure. Fixing this requires more than just slapping on some ‘mud’; it requires a deep understanding of the Interfacial Transition Zone (ITZ) and the chemistry of hydration.
The Physics of the Failure: Why Modern Patches ‘Pop’
The primary reason a patch detaches from old concrete is a mismatch in Modulus of Elasticity and thermal expansion. Old concrete is a living, breathing sponge. Over eighty years, it has carbonated, its pore structure has tightened, and its moisture capacity has shifted. When a contractor uses a high-strength, low-porosity modern ‘lick-and-stick’ product, they are creating a structural conflict. The new material shrinks as it cures; the old material stays static. This creates a shear plane. If you haven’t prepared the ‘tooth’ of the surface, the bond fails before the first frost hits.
“The bond strength of a repair material is fundamentally limited by the tensile strength of the substrate and the cleanliness of the interface.” – ICRI Technical Guideline No. 310.2R
In the freeze-thaw belts, this is lethal. Water migrates into that micro-gap between the old and new. When it freezes, it expands by 9%, acting as a hydraulic jack that pushes the patch right off the face. This same principle applies to brick spalling prevention; if the moisture can’t escape through the mortar because you used a hard Portland cement on soft historic brick, the brick face will sacrifice itself and explode.
The Forensic Process: Identifying the ‘Honeycombing’
Before you pick up a hawk and trowel, you have to play detective. I look for honeycombing—those pockets of air and unbonded aggregate that indicate the original pour was poorly vibrated or that the repair was ‘flash set.’ When repairing brick columns or retaining wall installation failures, the first step is always excavation. You have to ‘chase the rot.’ If you leave a single square inch of carbonated, dusty concrete, your new patch won’t have anything to bite into. This is where many ‘handyman specials’ fail. They see a small hole and fill it. A pro sees a small hole and makes it a large hole, cutting back to ‘sound’ concrete where the aggregate is still firmly locked in the cement paste. We call this creating a mechanical key. Without it, you’re just buttering a piece of toast that’s already covered in crumbs.
The ‘Cure’: A Step-by-Step Restoration
To fix a detached patch, you must first address the suction. Old concrete is thirsty. If you apply dry mud to a dry substrate, the old concrete will suck the moisture out of your repair material instantly. This ‘burns’ the bond, leaving a layer of unhydrated powder at the interface. This is the same reason we perform tuckpointing curved walls with pre-hydrated lime mortar; you have to manage the rate of moisture loss.
“Water penetration is the single greatest threat to masonry durability, and managing the suction of the substrate is the first line of defense.” – BIA Technical Note 7
Step 1: Mechanical Profiling
Forget the wire brush. You need an angle grinder or a chipping hammer to create a profile. You want the surface to look like a mountain range at a microscopic level. This increases the surface area for the bond. If I’m doing a masonry rescue after disaster, I’ll often use a needle scaler to ensure every bit of loose laitance is gone.
Step 2: The Slurry Bond Coat
Instead of relying on a chemical adhesive, I prefer a ‘cement slurry.’ It’s a mix of Portland cement and water (and sometimes a bit of acrylic fortifier) the consistency of heavy cream. You scrub this into the damp (but not dripping) substrate with a stiff brush. This fills the microscopic pores and creates a bridge for the heavier repair mortar to follow.
Step 3: Loading the Mud
Using your slicker or trowel, you must pack the mortar into the repair zone. Don’t just spread it. You need to exert pressure to collapse any air pockets. If you’re working on a vertical surface, like a brick column repair, you might need to do this in ‘lifts’ to prevent the weight of the wet mud from pulling itself off the wall.
Step 4: Managing the Joint
Once the patch is thumbprint hard, you finish it. For historic work, we might even use metallic brick colors application techniques to blend the new patch with the surrounding aged masonry. For brick patio restoration, the focus shifts to ensuring the edges of the patch are ‘feathered’ correctly so they don’t catch a snowblower blade or a heel.
Beyond the Surface: Chimneys and Walls
Often, a detached concrete patch on a chimney is a sign of internal distress. If I’m called for chimney leak detection, the first thing I check is the chimney damper repair status and the crown. If the crown is cracked, water is pouring down the internal flue, saturating the masonry from the inside out. No patch on the exterior will hold if the core is a wet sponge. The same goes for mortar repointing services. If the ‘mud’ isn’t compatible with the original material’s breathability, you’re just trapping the killer (moisture) inside the house. Do it once, do it right, or you’ll be calling me back in three years to pick up the pieces of your second failed attempt. Masonry is about the long game—it’s about respect for the chemistry of the stone and the physics of the environment.
{“@context”:”https://schema.org”,”@type”:”HowTo”,”name”:”How to Repair Detached Concrete Patches”,”description”:”A professional guide to repairing delaminated concrete using forensic masonry techniques.”,”step”:[{“@type”:”HowToStep”,”name”:”Substrate Preparation”,”text”:”Chip away all loose or hollow-sounding concrete until you reach solid aggregate. Create a rough profile for mechanical bonding.”},{“@type”:”HowToStep”,”name”:”Saturation”,”text”:”Dampen the old concrete to achieve a Saturated Surface Dry (SSD) condition, preventing the substrate from stealing moisture from the new mortar.”},{“@type”:”HowToStep”,”name”:”Bonding Slurry”,”text”:”Apply a cement-based slurry or bonding agent to the damp surface to ensure a molecular bridge between old and new materials.”},{“@type”:”HowToStep”,”name”:”Mortar Application”,”text”:”Pack the repair mortar firmly into the cavity using a trowel, ensuring no air pockets or honeycombing remain.”},{“@type”:”HowToStep”,”name”:”Curing”,”text”:”Keep the patch damp for at least 48 hours to allow for full hydration and to prevent shrinkage cracks.”}]}