
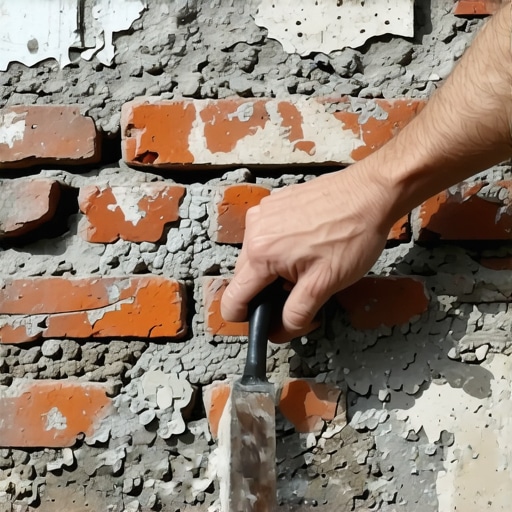
The Forensic Reality of Decaying Masonry
A crumbling facade is never just a cosmetic grievance. In my thirty years of handling a trowel, following in the footsteps of two generations before me, I’ve learned that a wall is a living, breathing organism. When you see dust on the window sill or a hairline fracture in the foundation, you aren’t looking at ‘old age’; you are looking at the evidence of a chemical and physical war. I’ve seen commercial parapet wall repair jobs where the masonry was so neglected that a single gust of wind could have sent a ton of brick onto the sidewalk below. I recall a specific forensic scene where a homeowner thought their stone foundation was just ‘settling.’ When I inserted my bore-scope into a deep void, I didn’t find solid earth; I saw that the interior structural steel was rusted to red dust, looking like a burnt matchstick trying to hold up a three-story Victorian. The mortar had failed decades ago, allowing moisture to turn the wall’s skeleton into a pile of iron oxide. This is the reality of the masonry rescue after a disaster—neglect is the slow-motion disaster that eats your equity.
The Physics of the ‘Sacrificial’ Joint
To understand when to rake out old mortar, you must understand the physics of the assembly. In historic restoration, particularly with pre-1940s structures, the mortar is designed to be the sacrificial element. It is intended to be softer and more permeable than the masonry units themselves. This is a concept often lost on modern ‘handyman’ types who slap high-strength Portland cement into a soft, lime-brick wall. When the sun hits a wall, the bricks expand. In the winter, moisture in the wall freezes. Water expands by approximately 9% when it turns to ice, creating immense internal pressure. If your mortar is too hard, that pressure has nowhere to go but through the face of the brick, causing ‘spalling’—where the beautiful exterior of the brick pops off like a scab. You need to rake out that old, brittle mud before it kills the masonry units it was meant to protect.
"Water penetration is the single greatest threat to masonry durability. The selection of mortar must ensure that the mortar is weaker than the masonry unit to prevent irreversible damage to the brick or stone." – BIA Technical Note 7
Top Signs It Is Time to Rake Out the ‘Mud’
1. The ‘Powder Test’ and Mortar Erosion
If you can take your thumb and rub a mortar joint and it falls away like beach sand, your binder is gone. This is often the result of crumbling mortar joint repair being ignored for years. The lime has carbonated to the point of total failure, or the Portland-to-sand ratio was botched from the start. Once the binder is gone, the wall is held up by gravity alone, with no lateral stability. This is particularly dangerous in foundation underpinning scenarios where the weight of the entire structure relies on the friction between those stones.
2. Vegetation and Biological Growth
When I see ivy or moss growing out of a joint, I don’t see ‘charm.’ I see a biological drill bit. Roots seek out the calcium in the mortar, physically prying the joints apart. This is a common sight during outdoor masonry fountain restoration. The moisture from the fountain fuels the root growth, which then creates pathways for more water, leading to a feedback loop of destruction. If you see green, it’s time to get the slicker and the rake out tool ready.
3. The Presence of Efflorescence
That white, salty film on your brick? That’s efflorescence. It’s the sound of the wall crying. It means water is moving through the masonry, dissolving internal salts, and depositing them on the surface as it evaporates. This ‘wicking’ action is a sign that the mortar joints are no longer shedding water but are instead acting like sponges. If left unchecked, sub-florescence can occur, where the salt crystals grow inside the brick, shattering it from the within.
4. Spalling Masonry Units
If the face of your brick or stone is falling off, the mortar joint is likely too hard. This usually happens after a bad stone veneer repair where someone used Type S mortar on a soft stone. The mortar stayed rigid while the stone tried to expand, and the stone lost the fight. Raking out this hard ‘mud’ and replacing it with a breathable, lime-based Type O or Type N mortar is the only way to save the remaining facade.
5. Stair-Step Cracks in the Foundation
Physics doesn’t lie. A stair-step crack following the mortar joints is a clear signal of settlement or hydrostatic pressure. The earth is pushing against your wall, and the mortar is the first thing to yield. In these cases, retaining wall reinforcement or helical piers might be necessary, but the forensic starting point is always raking out the failed joints to see how much the structure has actually moved.
"For the mortar should be made of the best pit sand, and the lime should be of the purest quality, for if the materials be not good, the work will not be durable." – Vitruvius, The Ten Books on Architecture
The Science of the Repair: Raking and Buttering
Raking out is not just about scratching the surface. To get a proper ‘tooth’ for the new mortar to bond to, you must rake out to a depth of at least two to two-and-a-half times the thickness of the joint—usually about 3/4 to 1 inch deep. I often use tuckpointing machine services for large-scale commercial jobs, but for delicate historic work, it’s all hand-tools. You want a clean, square-bottomed cut. If you leave a ‘V’ shape, the new mortar (the ‘mud’) will be thin at the back and will pop out within two winters. Once raked, we ‘butter’ the joints with fresh mortar, typically in 1/4 inch lifts to prevent shrinkage cracks. This is a slow, tactile process. You have to feel the ‘suction’ of the brick. If the brick is too dry, it will suck the water out of the mortar instantly—a ‘flash set’—leaving you with a brittle, useless joint. We ‘dampen’ the wall first to ensure the hydration process happens slowly, allowing the calcium silicate hydrates to form a dense, crystalline web that binds the wall together.
The Trap of Modern Materials
Many homeowners think tile grouts on masonry are a quick fix for small cracks. This is a disaster. Grout is designed for non-porous environments. It doesn’t have the breathability or the flexural strength required for an exterior masonry wall. Using the wrong material is like putting a plastic bag over your skin; the moisture gets trapped, and the rot begins. Whether it is a commercial parapet wall repair or a simple chimney fix, the chemistry of the mortar must match the original masonry’s density and porosity. If you do it once with the right ‘mud,’ it lasts a hundred years. If you do it twice with the wrong stuff, you’re just paying for the demolition of your own home.