
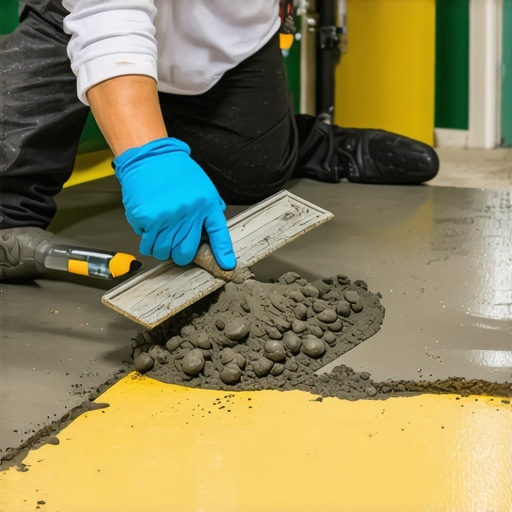
The homeowner thought it was just a hairline crack, a minor blemish on a twenty-year-old driveway slab. But when I put my scope inside the delaminated section, I saw the structural steel was rusted to dust. The ‘cosmetic’ flake they wanted me to cover was actually the tombstone of the concrete’s integrity. Most guys would have come in, slapped some bag-mix over the top, and cashed the check before the first frost. But I’ve spent thirty years watching those ‘lick-and-stick’ patches pop off like scabs on a knee. If you want to understand how to apply a thin-set concrete patch to a slab, you have to stop thinking like a handyman and start thinking like a chemist. Repairing concrete isn’t about covering a hole; it’s about managing the Interfacial Transition Zone (ITZ)—that microscopic battlefield where the old, carbonated concrete meets your new ‘mud.’ In the North, where the freeze-thaw cycle is a relentless hammer, a poor patch is just an expensive way to store water until it freezes, expands by nine percent, and explodes.
“The most common cause of repair failure is the lack of adequate surface preparation and the mismatch of physical properties between the repair material and the substrate.” – ACI 546R-14 Concrete Repair Guide
To get a patch to hold, you need to address the physics of suction and the chemistry of the bond. When you’re dealing with spalled concrete steps repair or a flat slab, the first thing you have to realize is that old concrete is a thirsty sponge. If you ‘butter’ dry, old concrete with new mortar, the old slab will instantly wick the moisture out of your mix. This ‘burns’ the patch, preventing the cement crystals from growing into the pores of the substrate. You don’t get a bond; you get a ‘cold joint’ that’s just waiting for a heavy tire or a snowplow to catch its edge. Before you even touch a trowel, you have to prep the ‘tooth’ of the surface. I’m not talking about a quick sweep with a broom. I’m talking about mechanical profiling. You need to get down to the sound aggregate. If the concrete is ‘soft’ or ‘dusty,’ your patch is going to fail because the surface it’s clinging to has no structural guts. This is where high-performance mortar mixes come into play. Unlike the standard Type S you’d use for brickwork pointing styles, a slab patch needs the tensile strength provided by fiber-reinforced mortars. These fibers act like microscopic rebar, knitting the patch together and resisting the shrinkage cracks that plague thin-set applications.
“Bond strength is the single most critical factor in the longevity of a thin-set masonry repair.” – ASTM C928 Standard Specification
In the forensic world, we look for ‘honeycombing’—those air pockets that form when a mix is too stiff or not properly consolidated. When you’re applying a thin-set patch, you need a ‘slurry coat’ first. This is a watery version of your repair material, scrubbed into the pores with a stiff brush. This ‘primes’ the surface, filling the microscopic voids and creating a chemical bridge for the thicker repair mud to follow. If you skip this, you’re just laying a heavy blanket over a bed of dust. This same principle applies whether you’re fixing a sidewalk or performing a complex chimney rebuild services project; if the base doesn’t have ‘tooth,’ the finish has no future. If the slab is sinking or tilting, a patch won’t save you. You’re looking at a geotechnical failure that might require foundation slab jacking or even retaining wall block replacement if the surrounding grades are shifting. But for surface spalling—that ugly flaking caused by road salt and moisture—a thin-set patch is the cure, provided you use the right material. Modern self-healing concrete foundations technology is trickling down into the repair market, with crystalline additives that react with incoming moisture to seal future micro-cracks. It’s a far cry from the ‘mud’ my grandfather used to mix by hand, but the physics of the trowel remain the same. You have to ‘strike’ the joint and feather the edges so there’s no lip for the elements to grab. When I’m inspecting a failed patch, I often see where the contractor tried to ‘elevate’ the look by over-troweling. This pulls the ‘fines’—the small cement particles—to the surface, leaving a weak, brittle layer that will flake off in six months. You want to work the material enough to consolidate it, then leave it alone. Let the chemistry of the hydration process do the heavy lifting. If you’re working on a chimney flue liner installation or modular masonry construction, you understand that thermal movement is the enemy. On a flat slab, that movement comes from the sun. A patch that is too rigid will crack when the slab expands. This is why we look for mortars with a modulus of elasticity that matches the host concrete. It’s about harmony, not just hardness. Don’t be fooled by the ‘quick-fix’ products at the big-box stores. A real repair requires a forensic eye. You have to look at the drainage, the soil compaction, and the original pour quality. If you see ‘map cracking’ across the whole slab, you’re not looking at a patch job; you’re looking at a total replacement. But for those localized spalls, a high-performance, fiber-reinforced thin-set, applied to a properly profiled and saturated surface, will outlast the rest of the driveway. It’s the difference between being a mason and being a guy with a bucket. Do it once, do it right, and you won’t have to listen to the ‘ring’ of a hollow, failing patch under your boots next spring.