I remember a call-out to an old Victorian where the owner was convinced a simple smear of caulk would hide a zig-zagging fissure climbing the northwest corner. He called it a cosmetic nuisance. I pulled a single brick from the wythe and found that the internal structural brick ties replacement was thirty years overdue; the steel was nothing but orange dust, and the wall was bowing outward like a sail in a gale. That ‘hairline’ crack was the final warning of a localized collapse. When you see a stair-step crack following the mortar joints, you aren’t just looking at a gap; you are looking at the story of a building trying to tear itself apart. In the masonry trade, we call this the path of least resistance. The mortar is the sacrificial lamb, and when the foundation shifts, the bricks stay whole while the ‘mud’ fails. To fix this fast, you have to stop thinking about aesthetics and start thinking about the geotechnical forces screaming beneath your boots.
The Physics of the Stair-Step: Why Your Wall is Moving
Stair-step cracks are almost always a symptom of differential settlement. This isn’t just ‘house settling’—that’s a phrase handymen use when they don’t understand soil mechanics. In regions with heavy clay, we deal with the hydration and dehydration cycle of the earth. When the soil loses moisture, it shrinks, creating a void. The weight of the masonry—thousands of pounds of clay and cement—descends into that void. Because masonry has incredible compressive strength but almost zero tensile strength, it snaps.
“The bond between mortar and unit is the most important property of a masonry wall, as it determines the resistance to water penetration and structural integrity.” – BIA Technical Note 7
When that bond is broken by settlement, the cracks follow the head joints and bed joints because the historic mortar analysis usually reveals a material weaker than the fired clay unit itself. If the crack is wider at the top than the bottom, your corner is dropping. If it’s wider at the bottom, your center is heaving. You have to diagnose the soil before you ever touch a trowel.
In northern climates, we battle the freeze-thaw cycle. Water enters the crack, expands by 9% as it turns to ice, and exerts thousands of pounds of pressure per square inch. This is where high-performance mortar mixes become a double-edged sword. If you use a mix that is too hard—rich in Portland cement—against an old, soft brick, you will cause the brick faces to spall. The ice can’t push the mortar, so it crushes the brick. You need a mix that breathes. I’ve seen outdoor masonry fountain restoration projects ruined in a single winter because some ‘pro’ used Type S mortar on 19th-century terra cotta. The result is always the same: the brick shatters, and the mortar remains, a tombstone for a ruined wall.
The Professional Fix: Stabilization Before Beautification
If you want to fix it fast, you do it right the first time so you don’t have to return. For structural movement, the only real ‘fast’ solution that lasts is foundation helical pier installation. This involves driving steel shafts deep into the load-bearing strata of the earth to bypass the unstable surface soil. Once the weight of the wall is transferred to the piers, the stair-step crack often closes on its own as the house is hydraulically lifted back to level. Only after the structure is pinned can you begin the brick column repair and cosmetic restoration. If you just point over a moving crack, you’re just ‘buttering’ a sinking ship. Within six months, that crack will telegraph right back through your new work, laughing at your effort.
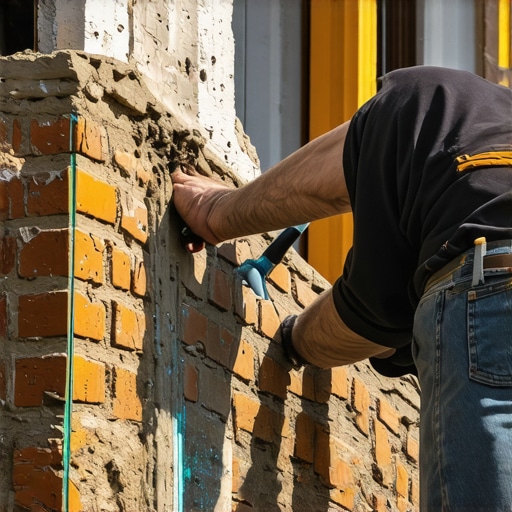
For the masonry work itself, the process starts with grinding. You need to rake out the failed mortar to a depth of at least 3/4 of an inch. Don’t use a thick demo saw if you can help it; use a vacuum-shrouded tuckpointing grinder to keep the dust down and preserve the ‘tooth’ of the brick. Once the joints are clean, you must wash them. Dry bricks have a high ‘suction’ rate; they will suck the water out of your new mud before it can hydrate, leading to a weak, powdery bond. I always mist the wall until it’s SSD—Saturated Surface Dry. This ensures the flush pointing services you provide actually integrate with the masonry unit.
Mixing the Mud: The Chemistry of Repair
When you’re on the hawk, your mortar should have the consistency of peanut butter—stiff enough to hold its shape but wet enough to stick when you ‘butter’ the joint. For historic homes, we skip the modern hardware store bags. We look at tuckpointing cost estimation based on custom-blended lime putty mortars.
“Cracking in masonry is usually the result of excessive tensile stress which the material cannot accommodate.” – ASTM C270
We use lime because it is self-healing. Through a process called carbonatization, lime mortar can actually seal micro-cracks over time as it absorbs CO2 from the air. This is the ‘Old World’ secret that keeps cathedrals standing while modern strip malls crumble. During a chimney crown repair or a chimney flue liner installation, using the wrong mortar density can lead to chimney fires or flue gas leakage because the thermal expansion rates don’t match. Always match the compressive strength of your mortar to the existing material.
Once the mud is in the joint, you wait for it to become ‘thumbprint hard.’ That’s when you take your slicker or jointer and strike the joint. For a stair-step repair, you want to match the original profile—whether it’s a grapevine joint, a weathered joint, or a simple concave. This isn’t just for looks; the shape of the joint determines how water sheds off the wall. A poorly struck joint creates a ledge where water sits, inviting the next freeze-thaw cycle to begin its destruction. We call this ‘honeycombing’ when the mortar is too dry and leaves voids, or a ‘cold joint’ when you fail to bond new material to old. Avoid both at all costs.
Final Inspection and Long-Term Value
The final step in a ‘fast’ fix is ensuring the drainage is corrected. Most stair-step cracks start because a downspout is dumping water right at the corner of the foundation, oversaturating the soil. You can do the best flush pointing services in the state, but if the water isn’t managed, the earth will move again. Whether you are performing an outdoor masonry fountain restoration or structural pinning, the goal is to manage the movement. Don’t fall for the ‘epoxy injection’ scam for brick walls; epoxy is for concrete. Masonry needs to move, breathe, and shed water. If you treat it like a rigid monolith, it will crack again. Treat it like a living assembly of units, and it will last another hundred years. [HowTo Schema] {“@context”: “https://schema.org”, “@type”: “HowTo”, “name”: “How to Repair Stair-Step Brick Cracks”, “step”: [{“@type”: “HowToStep”, “text”: “Diagnose the cause of settlement and stabilize the foundation if necessary using helical piers.”}, {“@type”: “HowToStep”, “text”: “Rake out damaged mortar joints to a depth of 3/4 inch using a tuckpointing grinder.”}, {“@type”: “HowToStep”, “text”: “Clean and dampen the joints to manage the suction rate of the bricks.”}, {“@type”: “HowToStep”, “text”: “Apply color-matched, strength-compatible mortar using a tuckpointer and hawk.”}, {“@type”: “HowToStep”, “text”: “Strike the joints when thumbprint hard to match the existing architectural profile.”}]}