The homeowner called me out because she thought she had a simple aesthetic problem—a hairline crack running through the third course of a massive porch support. But when I slid my fiber-optic scope through a weep hole and peered into the core, the reality was a forensic nightmare: the internal structural steel was rusted to a fine orange dust, and the central concrete fill had honeycombing so severe you could hide a fist in the voids. It wasn’t just a leaning column; it was a five-hundred-pound gravity bomb held together by little more than habit and a bit of dried mud. This is the reality of masonry forensics. You don’t look at the surface; you look at the physics of the failure. When a brick column begins to list like a tired sailor, most contractors will tell you to tear it down and start over. They want the easy money of a fresh build. But if you understand the chemistry of the materials and the geotechnical forces at play, you can save that column through structural stabilization and surgical intervention.
“Water penetration is the single greatest threat to masonry durability. Once the internal core is compromised, the load-bearing capacity of the assembly is fundamentally altered.” – BIA Technical Note 7
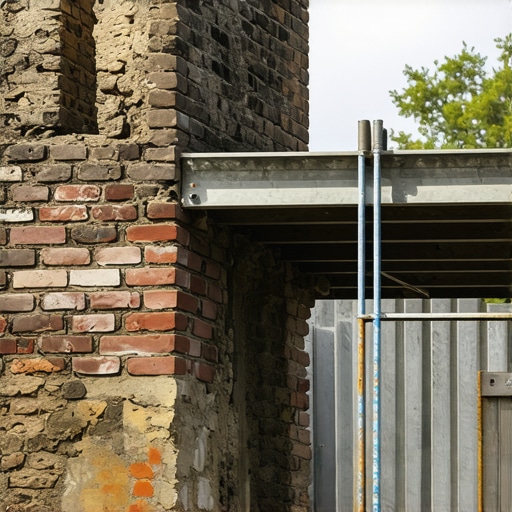
The Physics of the Lean: Why Columns Fail
Before you pick up a trowel or a hawk, you have to understand why the tilt happened. In our northern climates, we are constantly battling the freeze-thaw cycle. Water is a relentless wedge; it expands 9% when it turns to ice. If your column lacks a proper capstone or if the retaining wall capstone replacement was done with cheap, non-breathable mortar, water migrates into the core. It gets trapped. It freezes. It pops the faces off your bricks—a process we call spalling. But the lean usually starts deeper. It starts at the footing. Most leaning columns are victims of uneven soil settlement or hydrostatic pressure. If the soil beneath one side of the footing becomes saturated because of poor drainage from a nearby brick patio restoration, the bearing capacity drops. The column doesn’t just sit; it rotates. We call this a ‘moment’ in structural terms. If you don’t address the soil, any repair you do to the brickwork is just putting lipstick on a pig. You’ll be back in two years doing an emergency masonry repair when the whole thing finally gives way to gravity.
Surgical Stabilization: Foundation Slab Jacking
The modern cure for a listing foundation isn’t always a backhoe. We now use foundation slab jacking—specifically, high-density polyurethane injection. We drill tiny ports into the concrete footing and inject a two-part resin. This stuff isn’t just foam; it’s an exothermic beast. As it reacts, it expands with enough force to lift a house. We monitor the lift with laser levels, watching as the leaning column slowly moves back toward plumb. This process fills the voids (the honeycombing) in the soil and creates a stable, water-resistant base. It’s far superior to the old ‘mud-jacking’ methods because the foam doesn’t add significant weight to the soil and it doesn’t wash away. Once the footing is stabilized and the column is brought back to its vertical axis, we can turn our attention to the ‘skin’—the masonry itself.
Restoration of the Masonry Matrix
Once the column is level, you’ll likely find that the joints have opened up or ‘racked.’ You can’t just slap some Type S mortar in there and call it a day. You have to match the existing brickwork pointing styles to ensure the repair is invisible and structurally sound. This is where most guys fail. They use a mortar that’s too hard.
“The use of mortars harder than the masonry units themselves can lead to irreversible damage through differential thermal expansion. The mortar must always be the sacrificial element.” – ASTM C270 Standards
If you’re working on an older home, you need a soft lime mortar. For modern columns, I often use fiber-reinforced mortars. These have micro-strands of synthetic material that act like internal rebar, giving the mud a tensile strength that traditional mixes lack. When we ‘repoint’ the joints, we aren’t just filling holes. We are ‘buttering’ the joints to ensure a solid bond. We use a slicker to strike the joint—maybe a weathered joint or a V-joint—to ensure water sheds away from the core. If the column has unique aesthetics, such as a metallic brick colors application, we have to be even more careful. Modern metallic finishes are often just surface glazes. If you scrub them too hard with a muriatic acid wash after your repair, you’ll strip the color right off, leaving a dull, ugly patch that sticks out like a sore thumb.
Advanced Techniques: From Smokestacks to Porches
We often pull techniques from commercial smokestack repair for residential work. For a severely compromised column, we might use carbon-fiber reinforcement strips embedded in the bed joints. This provides incredible lateral stability without changing the profile of the column. This is the kind of stuff we model in BIM masonry projects—Building Information Modeling allows us to see how the load path travels through the brickwork and where the stresses are most likely to cause future cracking. If you have missing bricks, don’t just shove a new one in. You need to match the ‘tooth’ of the surrounding masonry. You may even need a retaining wall block replacement nearby to ensure the entire hardscape is moving as one unit. The goal is a monolithic structure that can handle the thermal expansion of the sun and the brutal contraction of the winter. Do it once, do it right, and that column will be standing long after the ‘lick-and-stick’ veneer jobs down the street have crumbled into the garden beds.